Help center
All our assistance at your disposal to use BeeMyFlex.
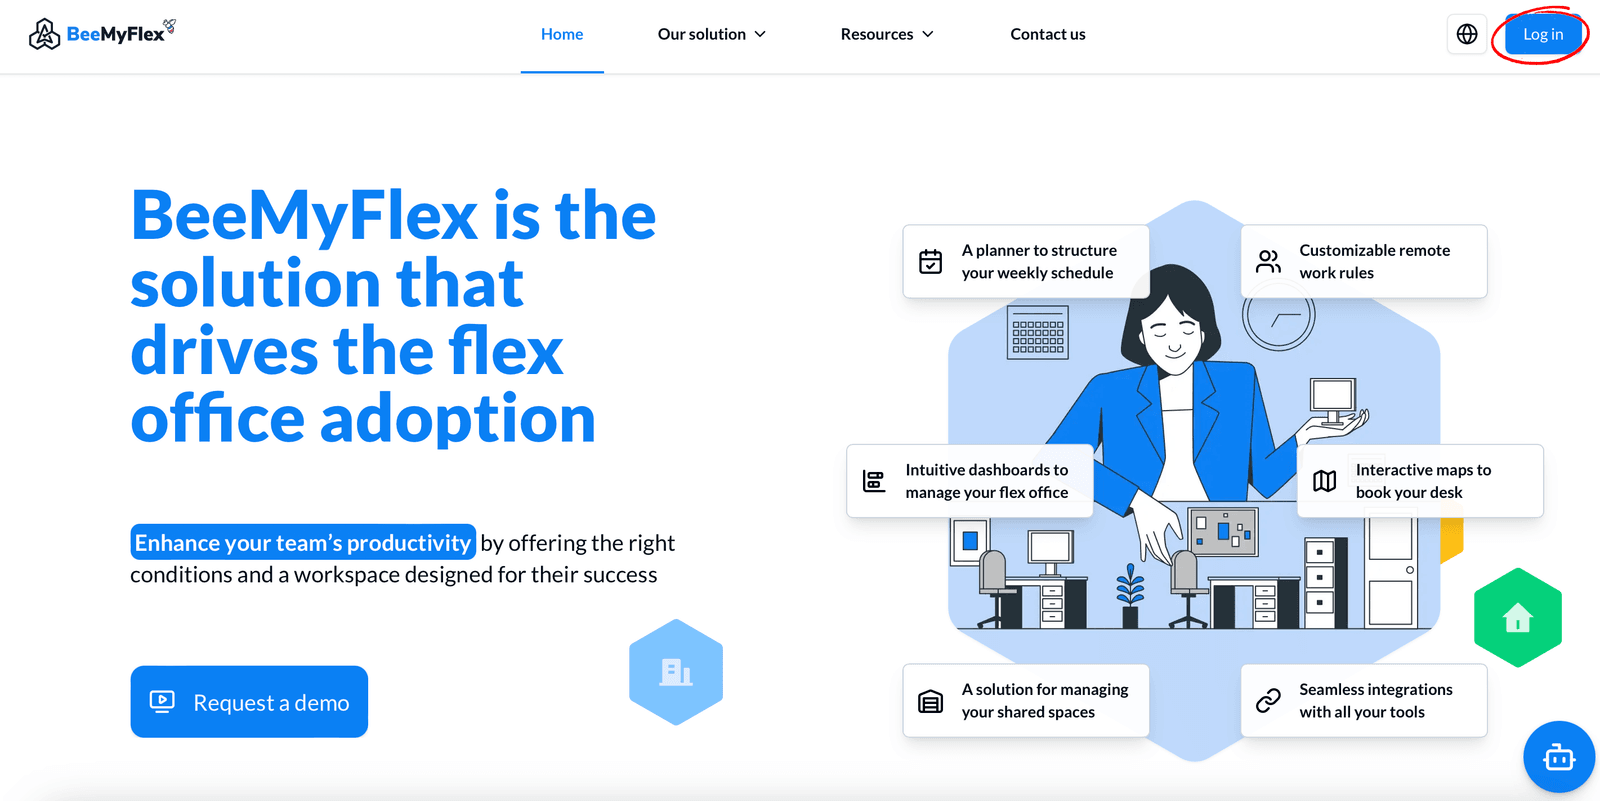
1️⃣ Click on the link 👉 https://www.beemyflex.com
2️⃣ Then click on the Log in button
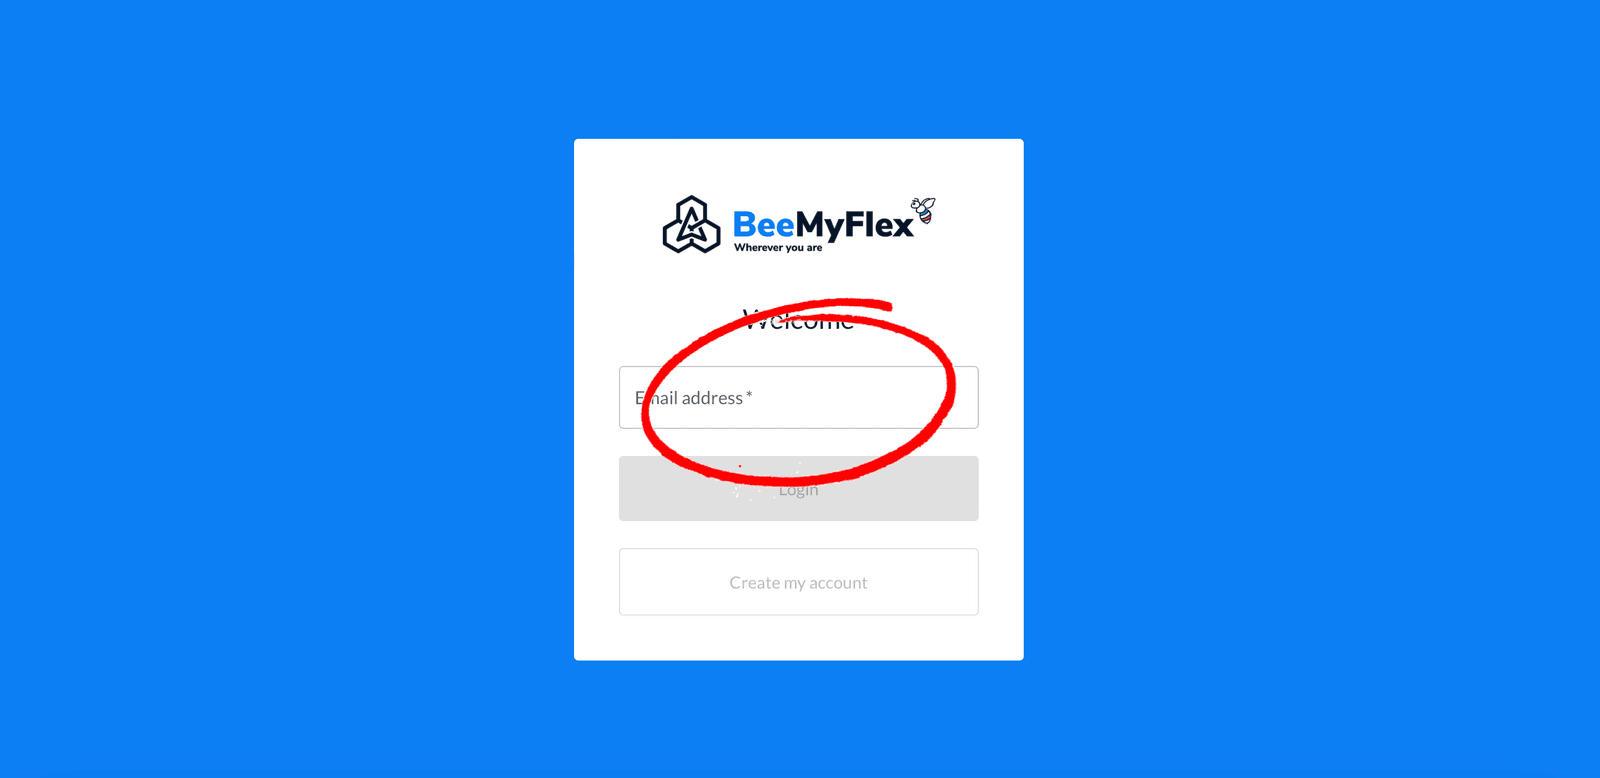
3️⃣ On the login screen, enter your professional email address:
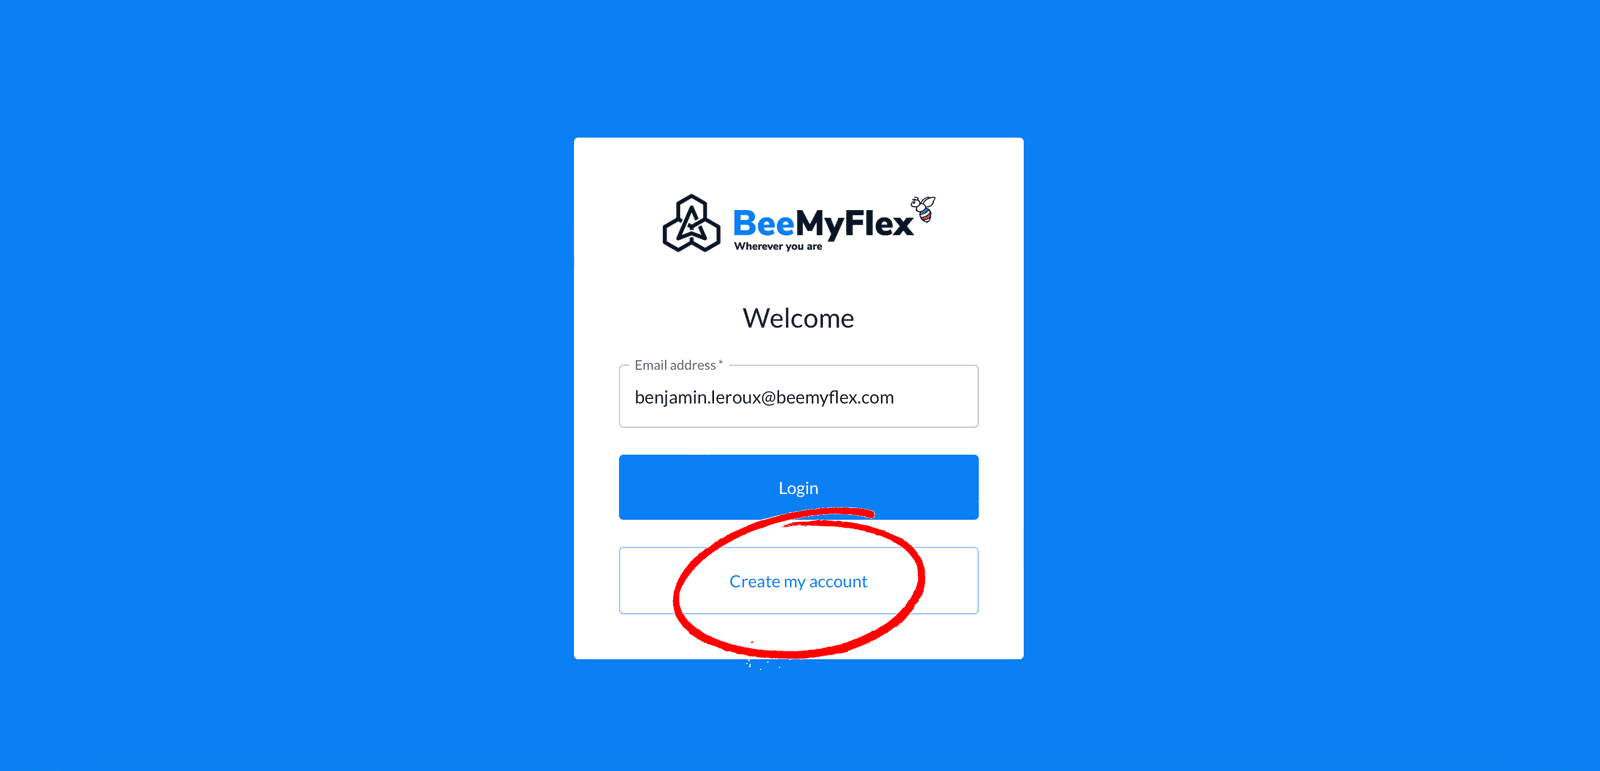
4️⃣ Then click on the Create my account button
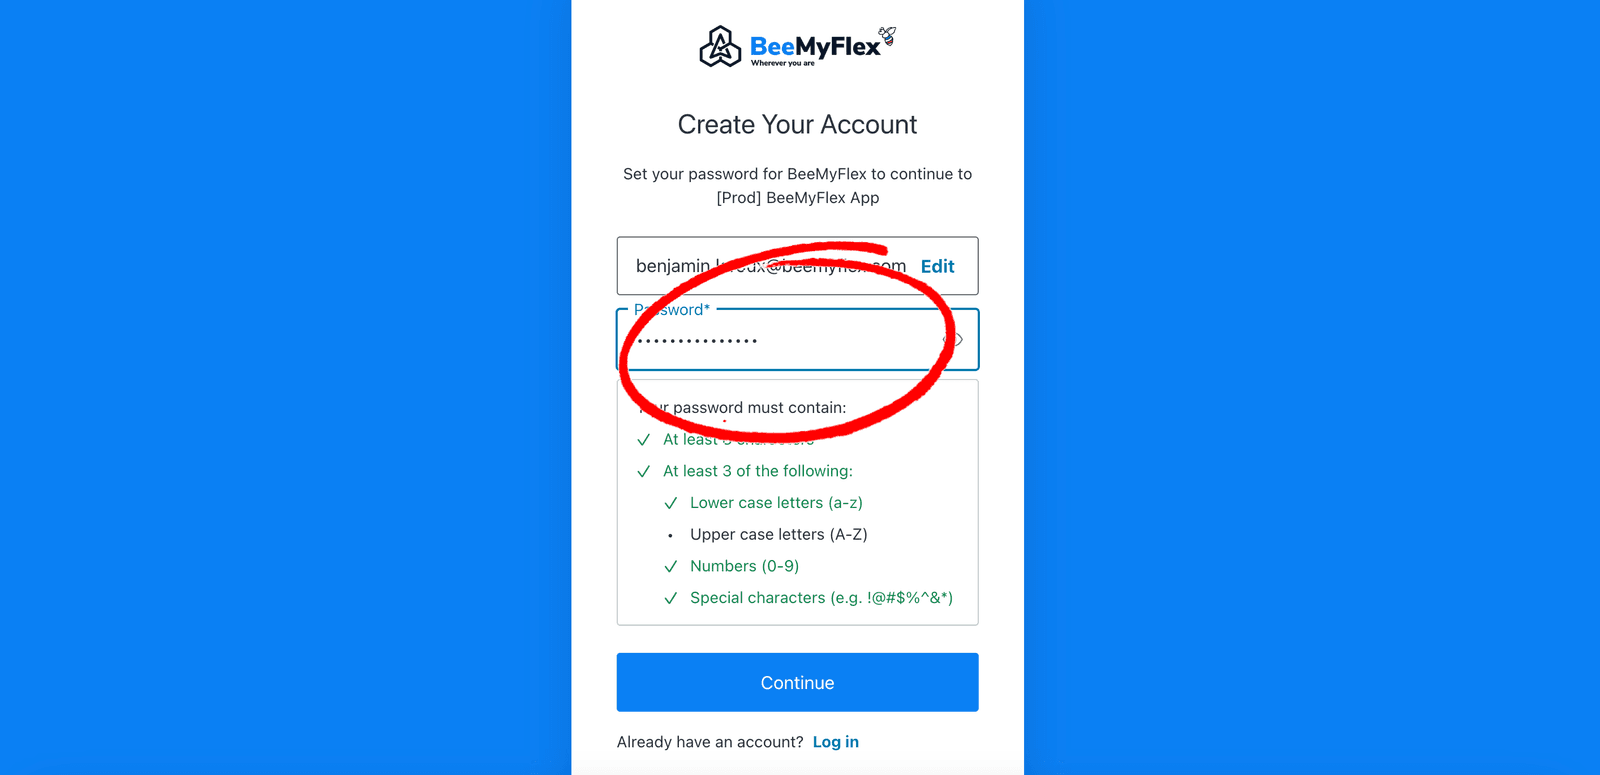
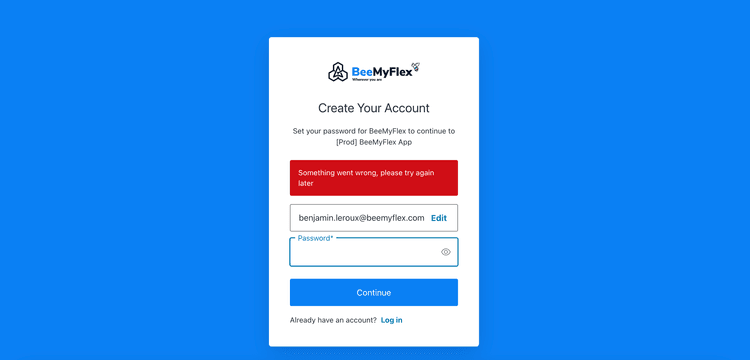
5️⃣ Now enter a password following the security policy and click Continue
⚠️ Your account have already been approved
If this message appears: something went wrong, please try again later, your account has already been created and validated.
In this case, you need to click on the Log in link and follow the step 👉 Sign in (basic mode)
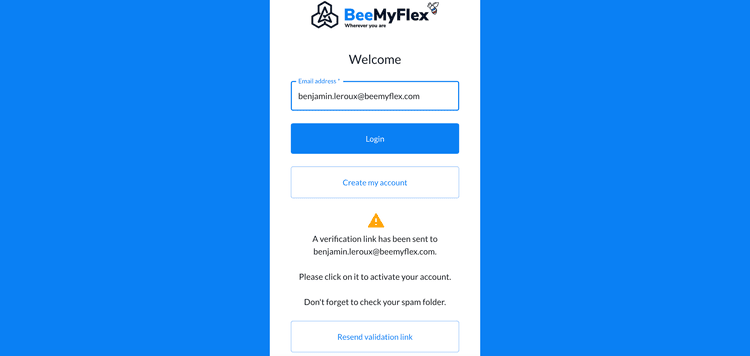
6️⃣ If this is not the case, the following screen will appear and you will receive an email to validate your account
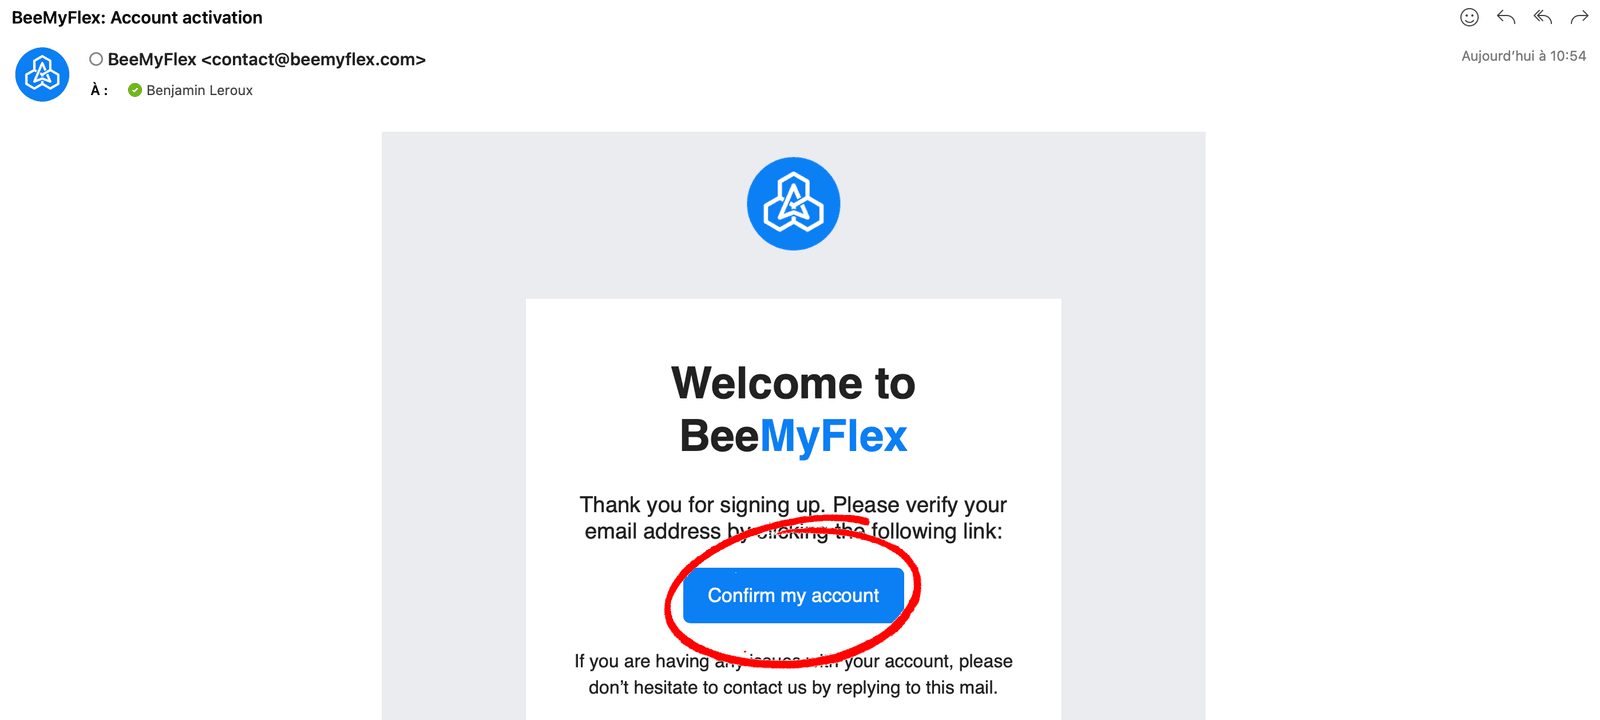
7️⃣ In the received email, click on the Confirm my account button
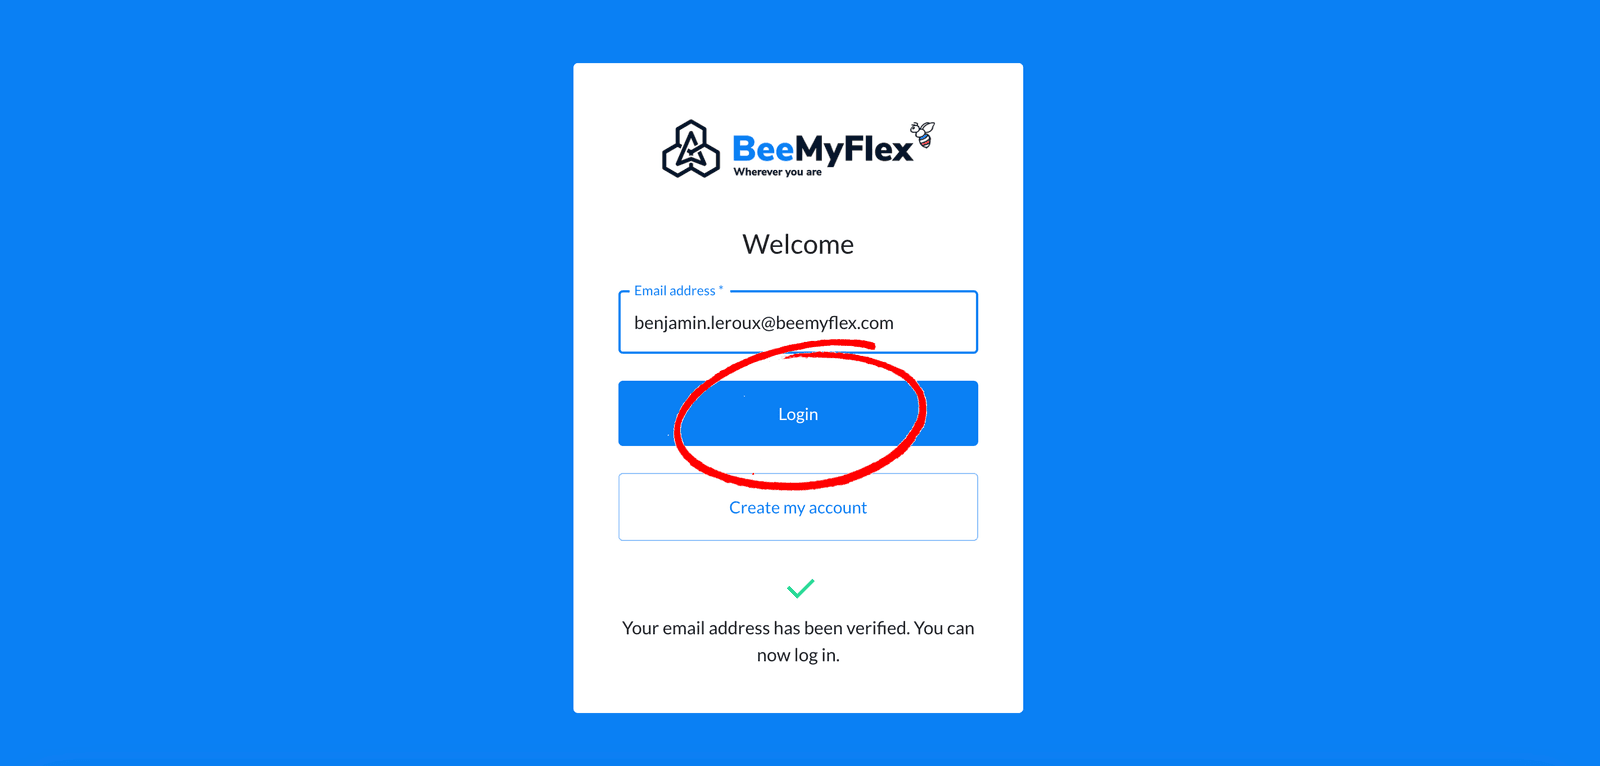
8️⃣ You are redirected to the login screen which indicates that your account is validated. You can now enter your professional email address and click Login
9️⃣ Enter your password and click Continue
✅ You are now logged into BeeMyFlex!
⚠️ You are not yet in your organization?
If this screen appears, your account has not yet been added to your company's organization
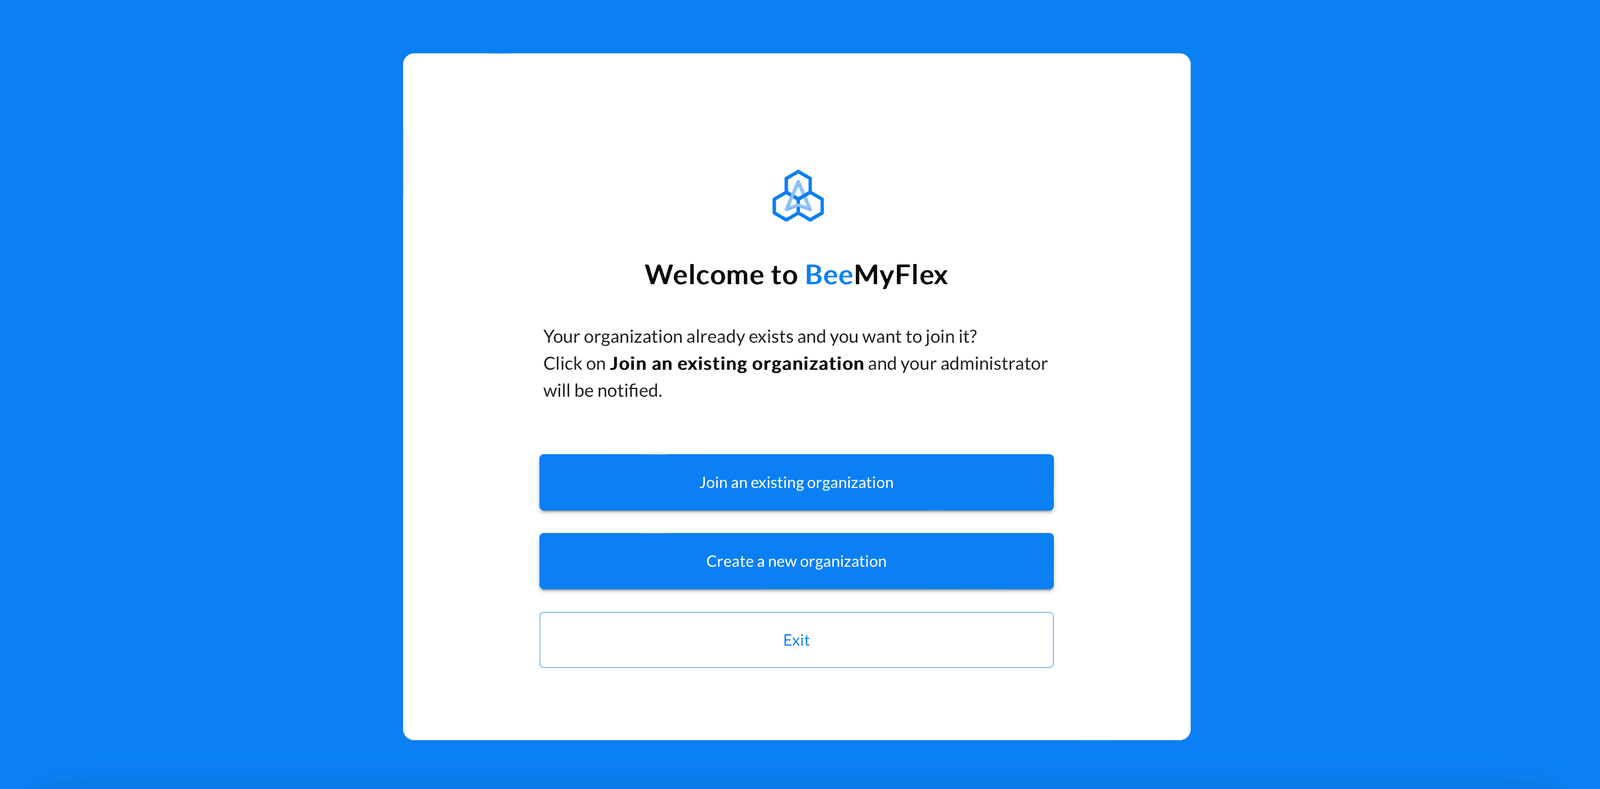
Then click on Join an existing organization
‼️ Do not click on Create a new organization
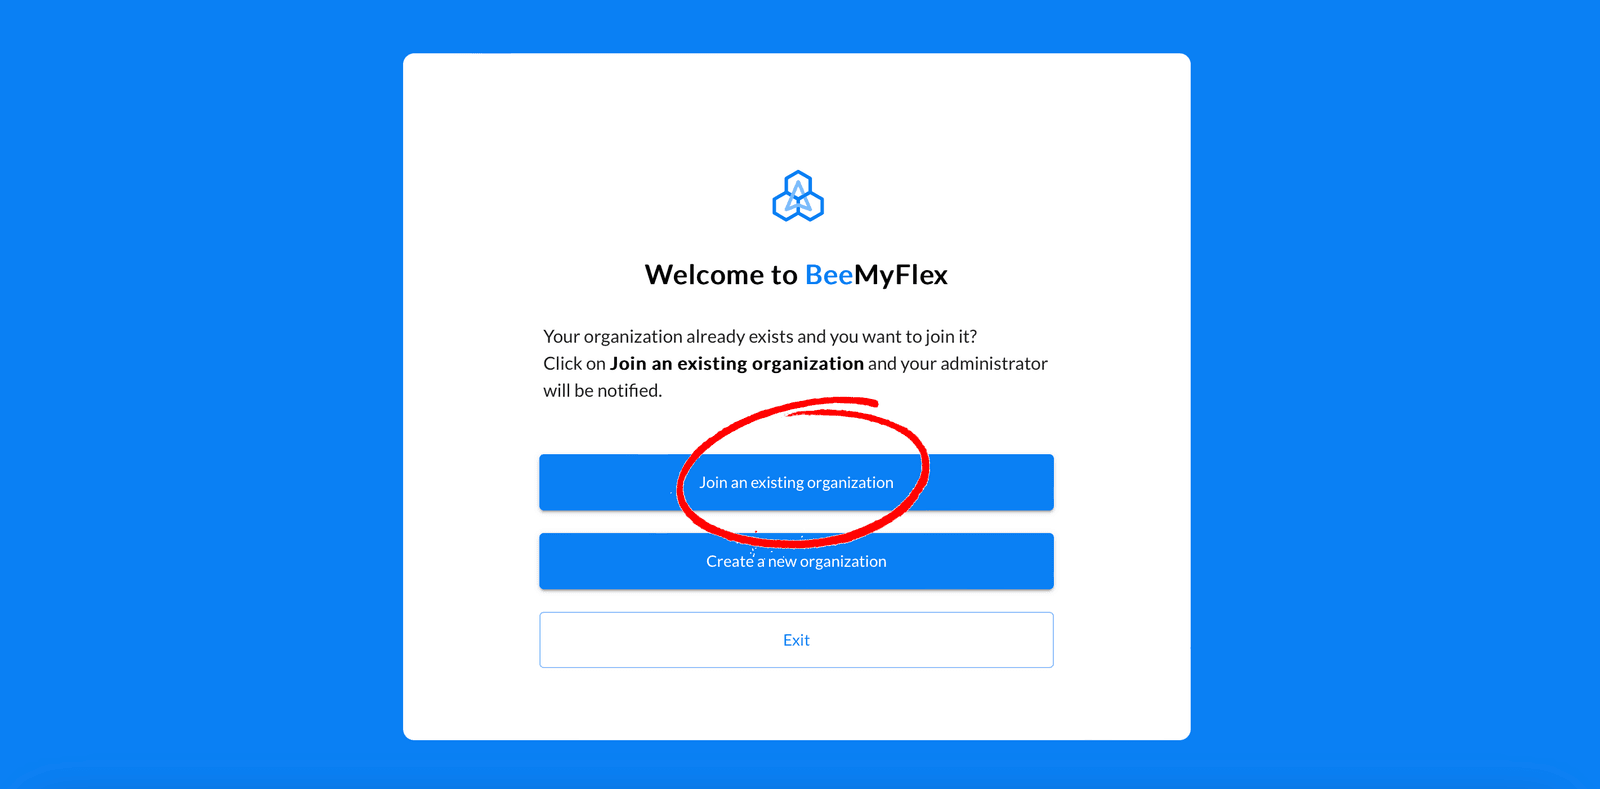
Your administrator will receive a notification and can accept you
Feel free to also notify your administrator
1️⃣ Click on the link 👉 https://www.beemyflex.com
2️⃣ Then click on the Log in button
3️⃣ On the login screen, enter your professional email address:
4️⃣ Then click on the Login button
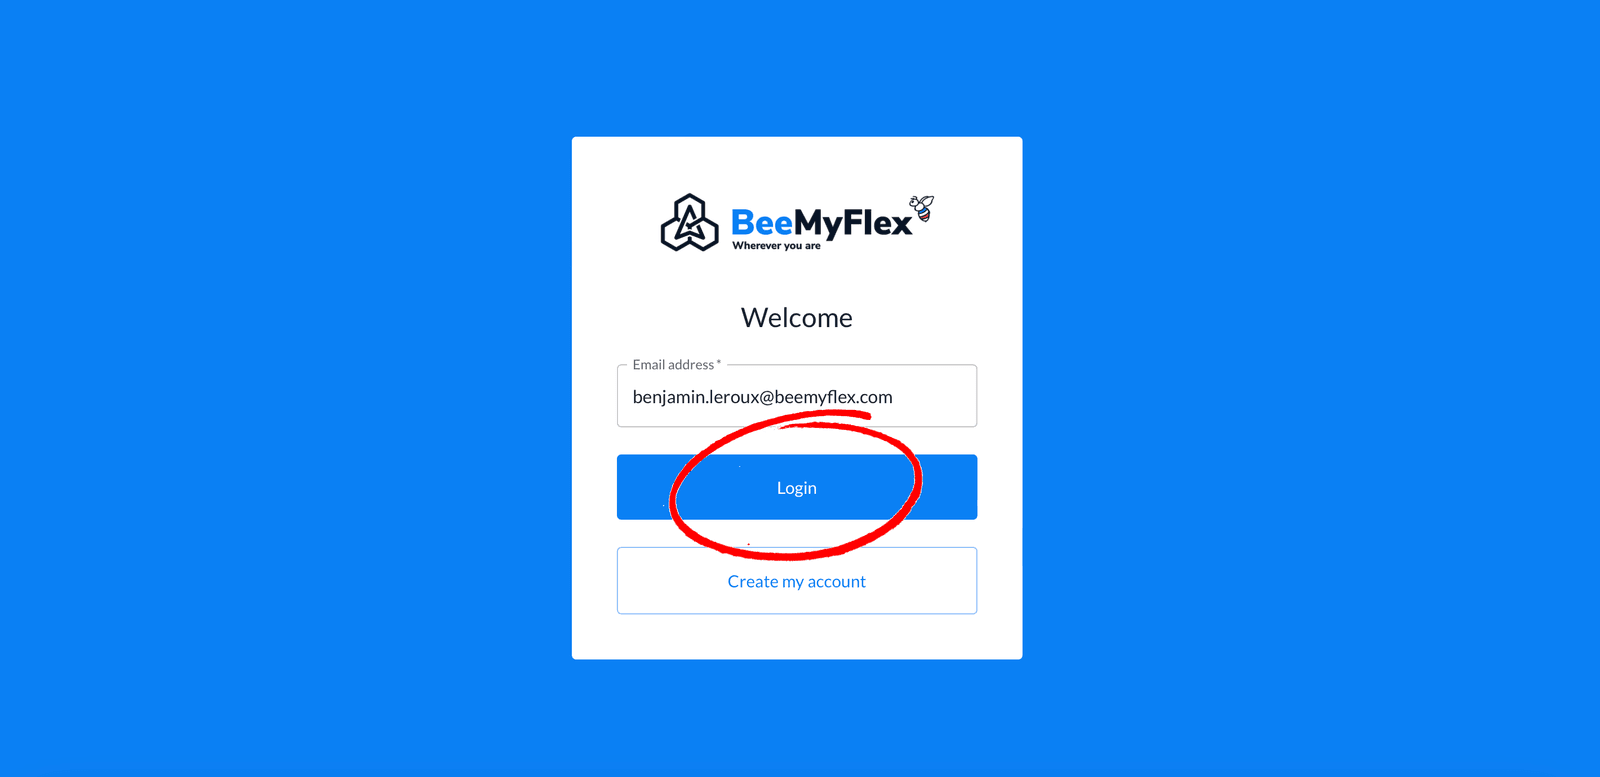
You will be redirected to your organization's page
Enter the information requested by your organization
✅ You are now logged into BeeMyFlex!
⚠️ You are not yet in your organization?
If this screen appears, your account has not yet been added to your company's organization
Then click on Join an existing organization
‼️ Do not click on Create a new organization
Your administrator will receive a notification and can accept you
Feel free to also notify your administrator
1️⃣ Click on the link 👉 https://www.beemyflex.com
2️⃣ Then click on the Log in button
3️⃣ On the login screen, enter your professional email address:
4️⃣ Then click on the Login button
5️⃣ Now click on the Forgot password link
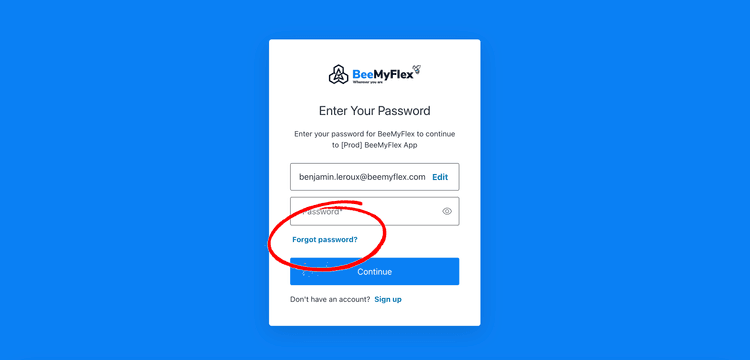
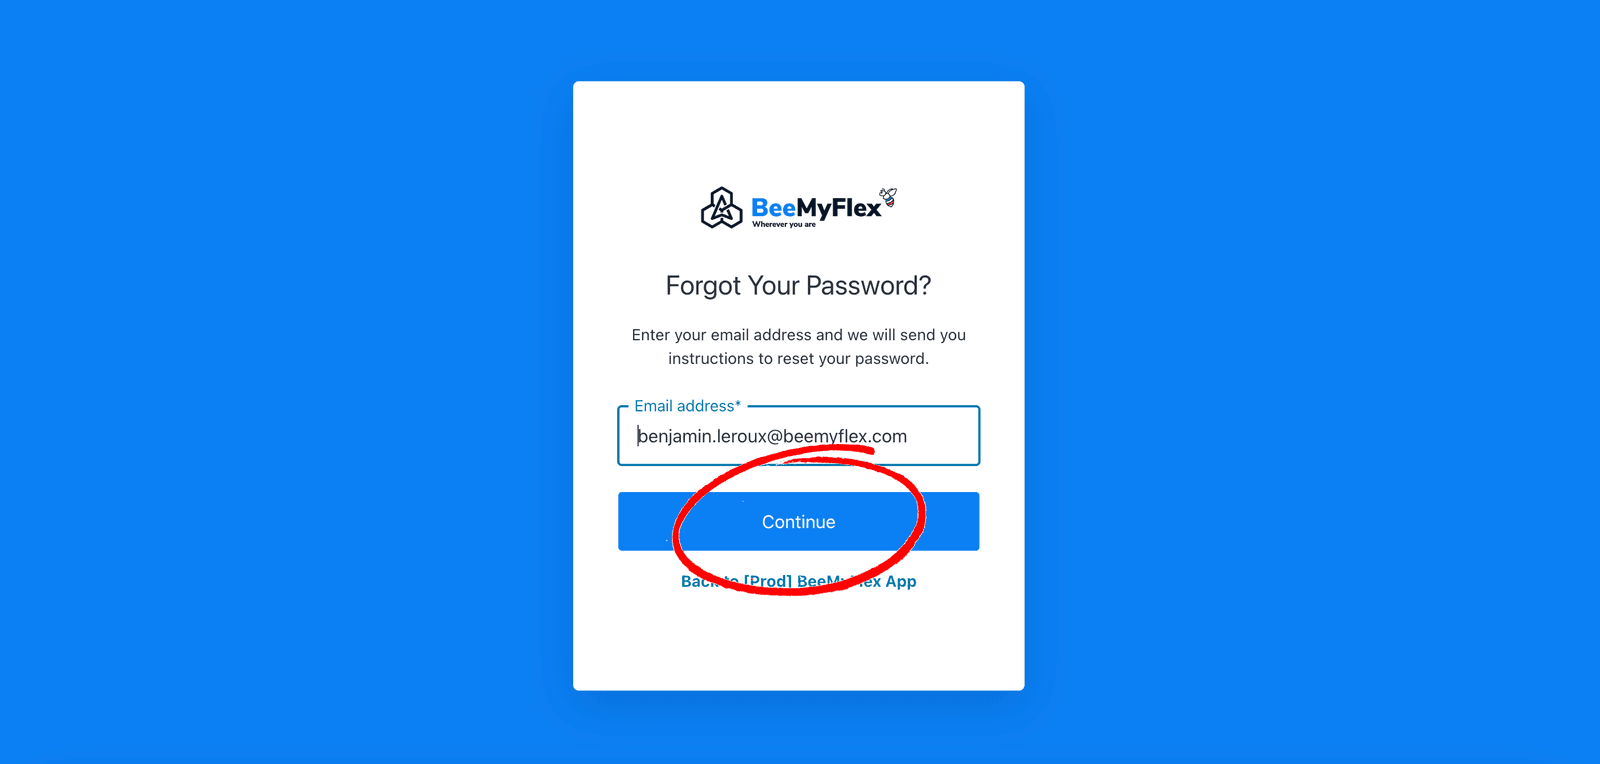
6️⃣ On this screen, click Continue
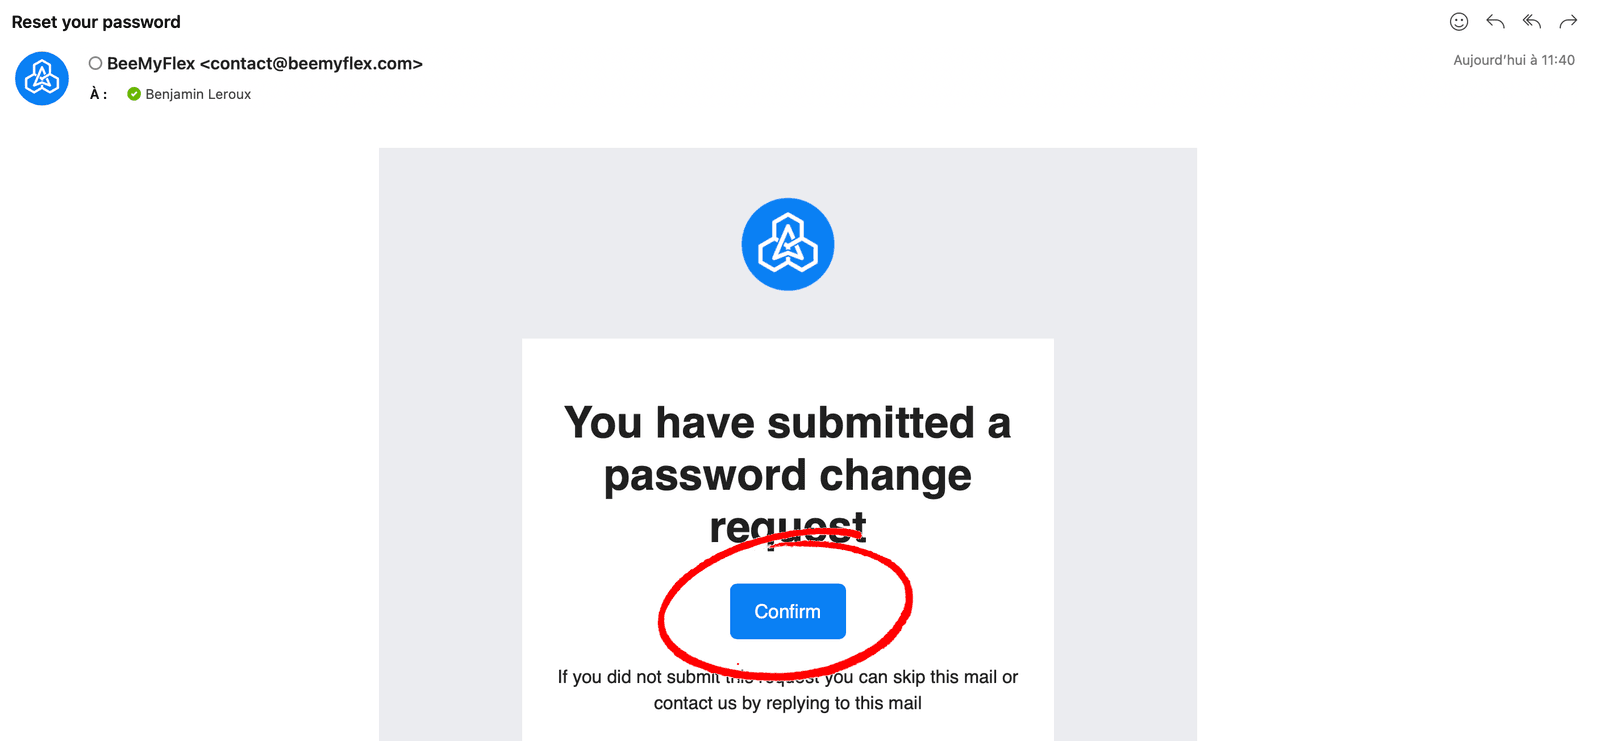
7️⃣ In the email you will receive, click on Confirm
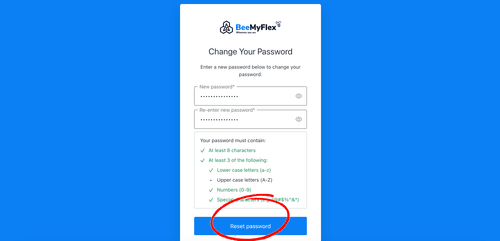
8️⃣ Now enter your new password and confirm it. Then click on Reset password
✅ Your password has been successfully changed!
Presentation of BeeMyFlex
Hello and welcome. We will show you how to use the features of BeeMyFlex.
1️⃣ The Live
Once authenticated, BeeMyFlex allows you to instantly see the status of other collaborators thanks to the Live.
📌 You can create some Groups personalized, for example if you work with several collaborators on the same subject or project.
This allows you to restrict the display and easily see the presence status of collaborators in this group.
2️⃣ The navigation bar
At the top on the web version, and at the bottom on the mobile version, is the navigation bar. It allows you to access the different functionalities.
At the top right, you find your Notification Center, as well as access to your Profile.
A colored badge tells you your type of presence:
3️⃣ Your calendar
To enter your presence status, simply go to your Calendar BeeMyFlex.
👉 To complete your calendar, simply select a date, and indicate your presence in the morning, afternoon, or all day.
If for example I am teleworking on Thursday April 7 morning, I select the status Telework characterized by the green color code.
If I am present on site in the afternoon, I select the status Office characterized by the blue color code.
📌 As there is still a place in my Workplace by default, the latter is automatically offered.
📌 In the event that there is no more space, or that I would like to work with one of my Groups which is not on the same Workplace, I can select another one from the list.
✅ Once registered, my Calendar updates with the corresponding color codes.
To complete your calendar faster:
📌 If Thursday, April 7 is a typical day that occurs frequently, I can copy this date and apply it to other dates on my calendar.
📌 I can copy a typical week and apply it to other weeks on my calendar.
📌 I can also complete my calendar by selecting several dates, and apply the same status for all these dates.
📌 I can even select an entire period, and apply the same status for all these dates.
Application of the rules on teleworking and office presence:
The rules on teleworking apply automatically depending on my rider.
If, for example, I am authorized to telework 2 days a week, and that I cannot not be teleworking on Monday mornings and Friday afternoons, if I declare that I will be teleworking next Friday, a message warns me and reminds me of the rules of my amendment.
👉 I have the possibility to deviate by justifying my decision with a comment which will be automatically transmitted to my manager.
4️⃣ The forecast schedule of other collaborators
On BeeMyFlex, it is also possible to have access to the schedule of other collaborators, or of my Groups personalized work.
👉 You access it by clicking on Forecasts :
5️⃣ My user profile
Finally, I can access my information at any time. Profile and possibly notify my administrator if any of the data is not correct.
Live: New Feature
🙌 The LIVE view has evolved and now displays more useful information.
1️⃣ On the left side of the screen, you can now see the visibility of your team and groups for the day (morning and afternoon).
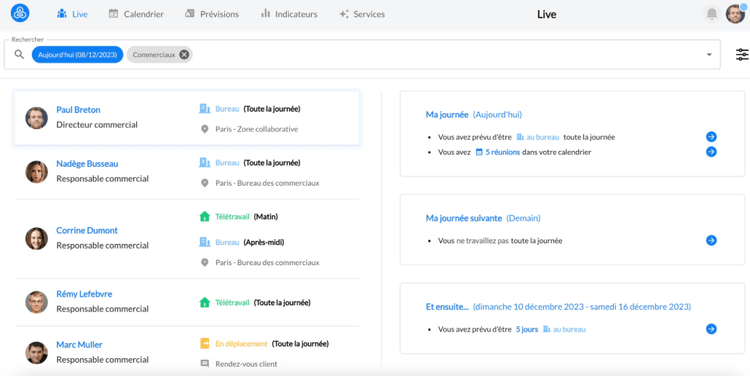
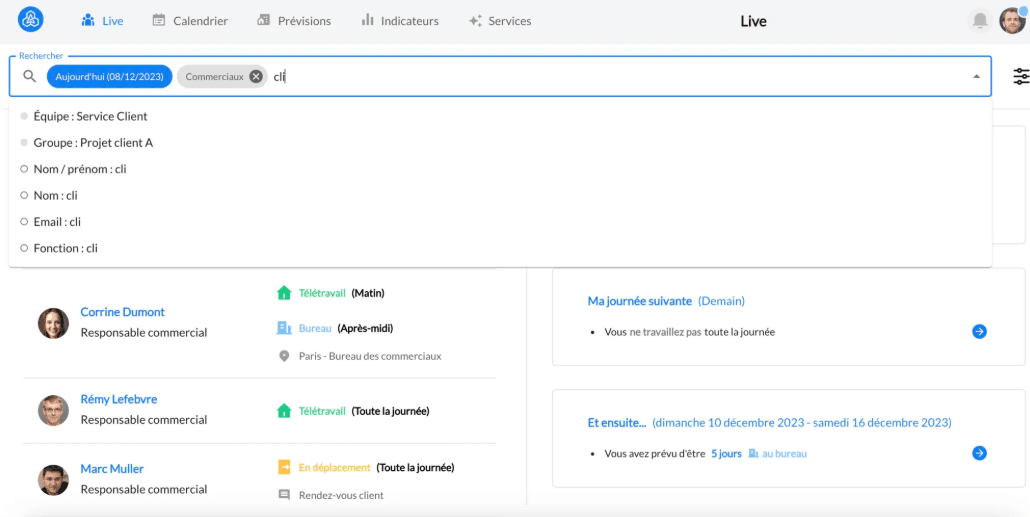
2️⃣ The new smart search bar allows you to more easily choose the team or group to display, and offers additional filters.
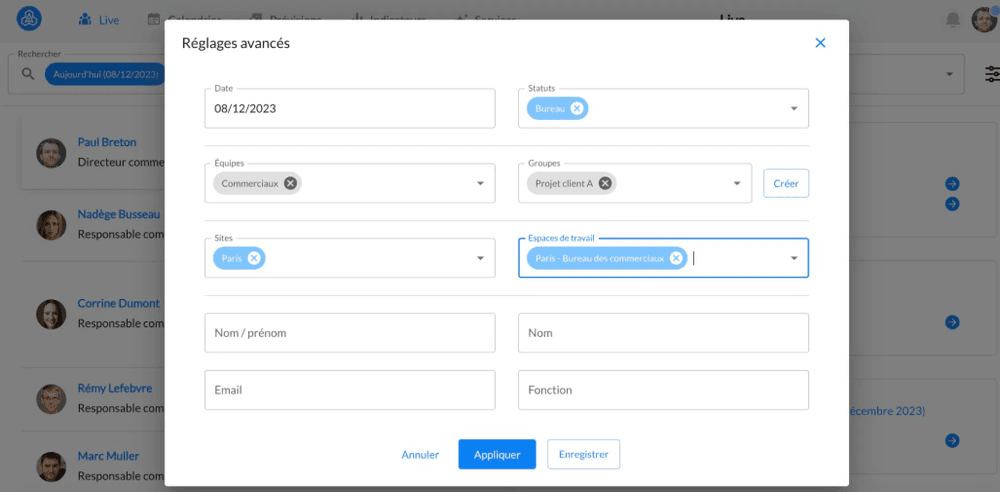
3️⃣ You can also use the advanced search screen by clicking on the filters button.
4️⃣ On the right side of the screen, you will now find useful information about your day, the next day, and the days ahead, such as:
📍 Your working mode
ℹ️ Your reservations (parking, meeting room, shared vehicle, company restaurant seat, etc.)
🗓️ Your appointments (if you have connected your Outlook or Google Calendar account)
Add a Comment When Indicating a Business Trip
You can now provide the reason for your business trip in an optional field.
Simply go to your calendar, and when you select the Business Trip status, a field will allow you to enter additional information.
This comment is visible to everyone in both the Live View and the Forecasts.
Connect Your Outlook Office 365 Calendar
ℹ️ This version does not allow customizing Outlook Office 365 statuses based on BeeMyFlex statuses.
ℹ️ This version does not automatically update your Outlook Office 365 calendar when you modify your BeeMyFlex calendar. However, when you make a change in your BeeMyFlex calendar, another event is automatically created in Outlook Office 365. You must therefore manually delete the old event.
To connect your Outlook Office 365 calendar:
👉 Click on your profile picture or initials in the top right corner of the screen and select My Integrations.
👉 Click Connect to the right of the Office 365 logo.
👉 Sign in with your Microsoft account and accept the required permissions.
👉 Allow the application to access your information.
✅ Your Outlook Office 365 calendar is now connected to your BeeMyFlex calendar.
📌 When you indicate in BeeMyFlex that you are working remotely on a given day, an appointment is automatically created in your Outlook Office 365 calendar.
This appointment is automatically linked to the Working Elsewhere status in Outlook Office 365.
📌 The same applies when you indicate that you are on a business trip.
📌 In the case of an absence, the automatically created appointment in Outlook Office 365 will appear with the Out of Office status.
ℹ️ The mapping between BeeMyFlex statuses and Outlook Office 365 statuses is not customizable (this will be available in a future version).
📌 When you indicate in BeeMyFlex that you are working remotely for half a day, a half-day appointment is automatically created in your Outlook Office 365 calendar. For example, if the half-day is in the morning.
📌 You can disconnect your Outlook Office 365 calendar from your BeeMyFlex calendar at any time by clicking on My Integrations in the main menu.
ℹ️ A change in presence in the BeeMyFlex calendar is not automatically updated in Outlook Office 365. It creates another event in Outlook Office 365 (a future version of BeeMyFlex will allow synchronized update
Connect Your Google Calendar
ℹ️ This version does not automatically update your Google Calendar when you modify your BeeMyFlex calendar. However, when you make a change in your BeeMyFlex calendar, another event is automatically created in Google Calendar. You must therefore manually delete the old event.
To connect your Google Calendar:
👉 Click on your profile picture or initials in the top right corner of the screen and select My Integrations.
👉 Click Connect to the right of the Google Calendar logo.
👉 Sign in with your Google account and accept the required permissions.
👉 Allow additional access to your Google account.
✅ Your Google Calendar is now connected to your BeeMyFlex calendar.
📌 When you indicate in BeeMyFlex that you are working remotely on a given day, an event is automatically created in your Google Calendar.
📌 The same applies when you indicate that you are on a business trip or absent for a day.
📌 When you indicate in BeeMyFlex that you are working remotely for half a day, a half-day event is automatically created in your Google Calendar. For example, if the half-day is in the morning.
📌 You can disconnect your Google Calendar from your BeeMyFlex calendar at any time by clicking on My Integrations in the main menu.
ℹ️ A change in presence in the BeeMyFlex calendar is not automatically updated in Google Calendar. It creates another event in Google Calendar (a future version of BeeMyFlex will allow synchronized updates).
Preferences: Language Selection in the App
It is now possible to choose and change your language in the application.
👉 Click on your initials or avatar in the top right corner
👉 Select your profile
👉 Go to the My Settings section and change the language:
ℹ️ Currently, the only available languages are:
🇫🇷 French
🇬🇧 English
🇳🇱 Dutch
Entry: Delete a Record from Your Calendar
It is now possible to delete a record from your calendar.
For example: if you had planned to be in the office but might have a business trip (and are not yet sure), you can delete your choice in the calendar while waiting for better visibility on your schedule.
👉 In your Calendar or Forecasts, click on the date for which you want to delete the record and select the trash bin icon.
✅ Your record for this date has been deleted!
Flex Office: Specify Who Is Authorized to Access a Workspace
Until now, it was only possible to either share a workspace or make it private.
🔓 When the workspace was private, only the employees assigned to it by default could access it.
Now, you can specify who is authorized to access each workspace!
✨ We also took this opportunity to redesign the administration screen for Sites and Workspaces.
👉 To access it, simply click on your initials or avatar in the top right corner.
👉 Select the name of your organization.
👉 On the Administration screen, click on the Sites and Workspaces section.
👉 To specify who is authorized to access a workspace, simply select the team(s) and/or employee(s).
ℹ️ For an open workspace (accessible to everyone), simply select the value Everyone.
Calendar: Limit the Forecast Entry Period
It is now possible to block forecast schedule entries beyond a certain period.
👉 To access this setting, simply click on your initials or avatar in the top right corner.
👉 Select the name of your organization.
👉 On the Administration screen, click on the Configuration section.
👉 In the field Number of future days editable, enter the maximum number of forecast days that users can fill in.
Calendar Updates Reflected in Outlook and Google
💡 Until now, a change in presence in the BeeMyFlex calendar was not automatically updated in Outlook or Google Calendar. It created another event in Outlook or Google Calendar, and the user had to delete the previously created event.
✔️ From now on, you don’t have to do anything — BeeMyFlex automatically updates your calendar changes in Outlook and Google Calendar!
Create and Manage Rules in the Central Administration
ℹ️ This feature is only accessible to an Administrator.
💡 Good news for administrators: you no longer need to delegate access to act on behalf of your managers and manage their rules.
✔️ You now have a dedicated screen to view all the rules in your organization, and you have full control to edit them!
To access it:
👉 Click on your profile picture or initials in the top right corner of the screen and select the name of your organization.
👉 On the new page, select the Rules section.
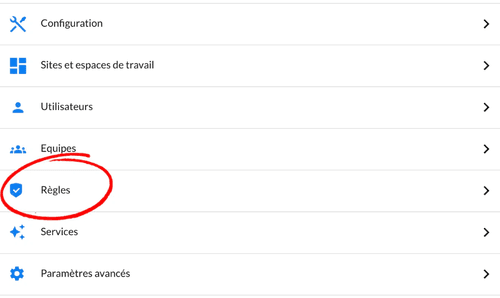
✅ You will now see the list of all rules in your organization.
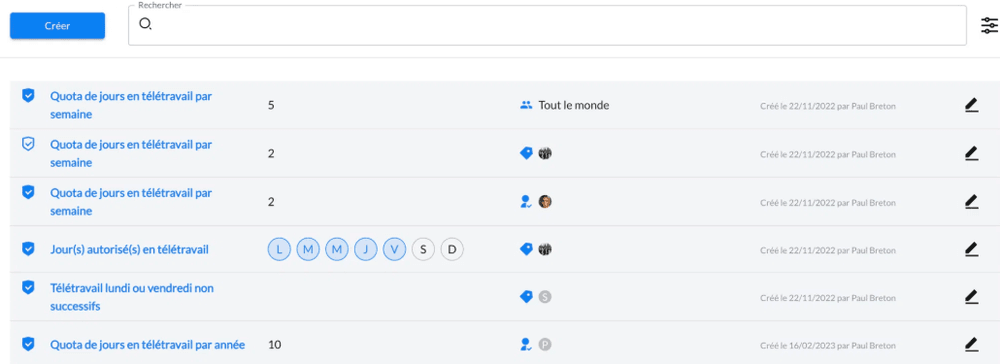
ℹ️ You can create, archive, and edit all rules.
To connect your Outlook Office 365 calendar:
👉 Click on your profile picture or initials at the top right of the screen and select My Integrations.
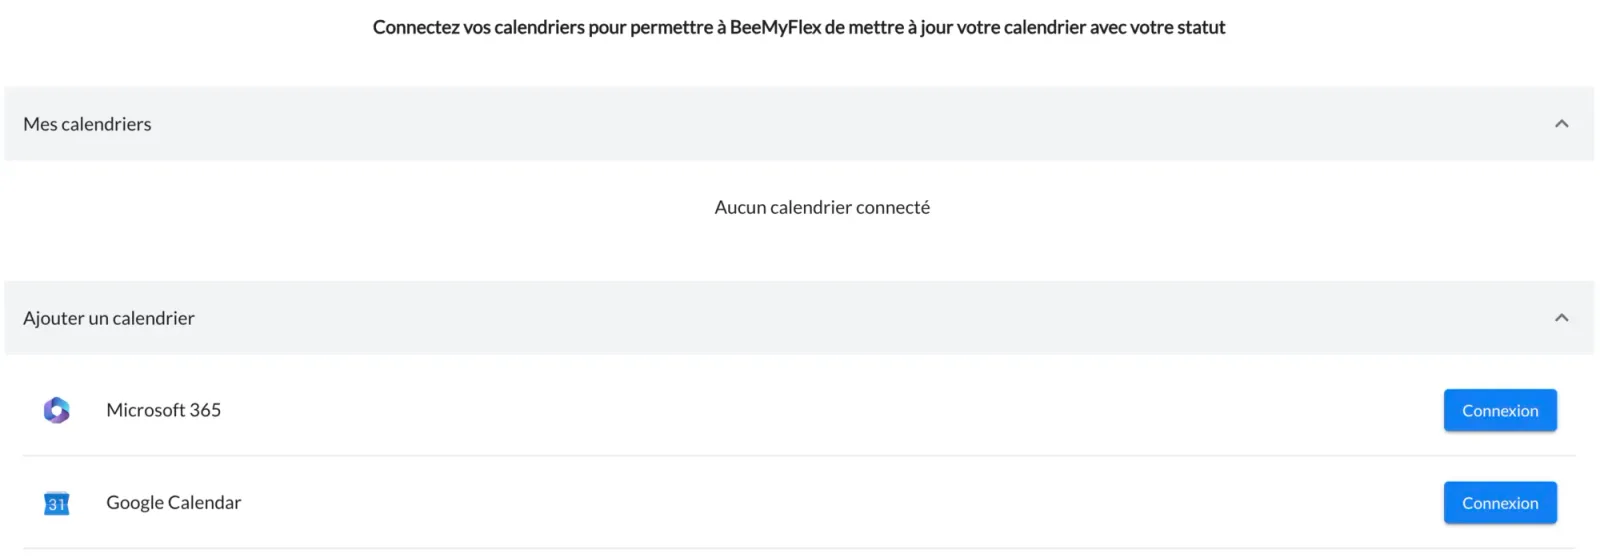
👉 Click on Connect next to the Office 365 logo.
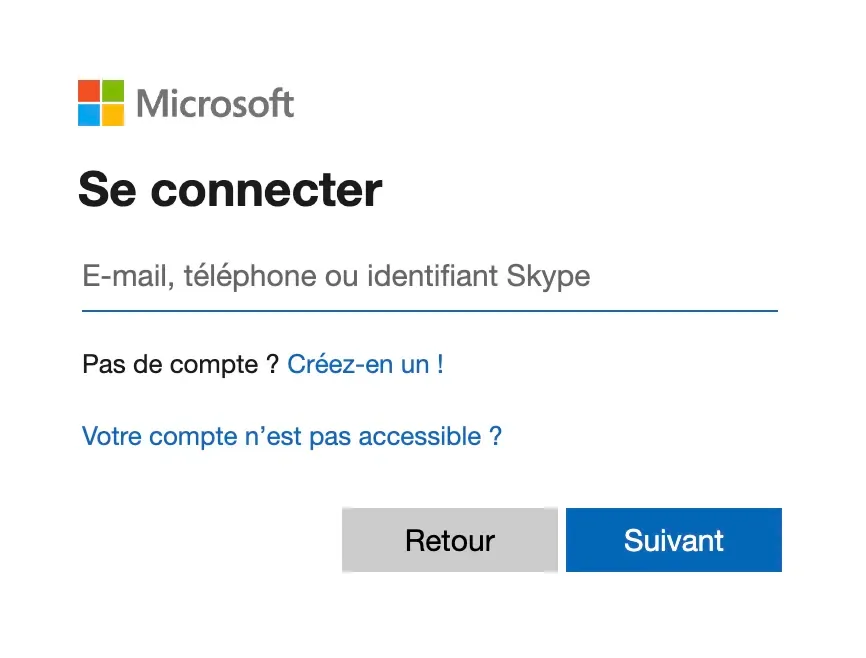
👉 Log in with your Microsoft account and accept the required terms.
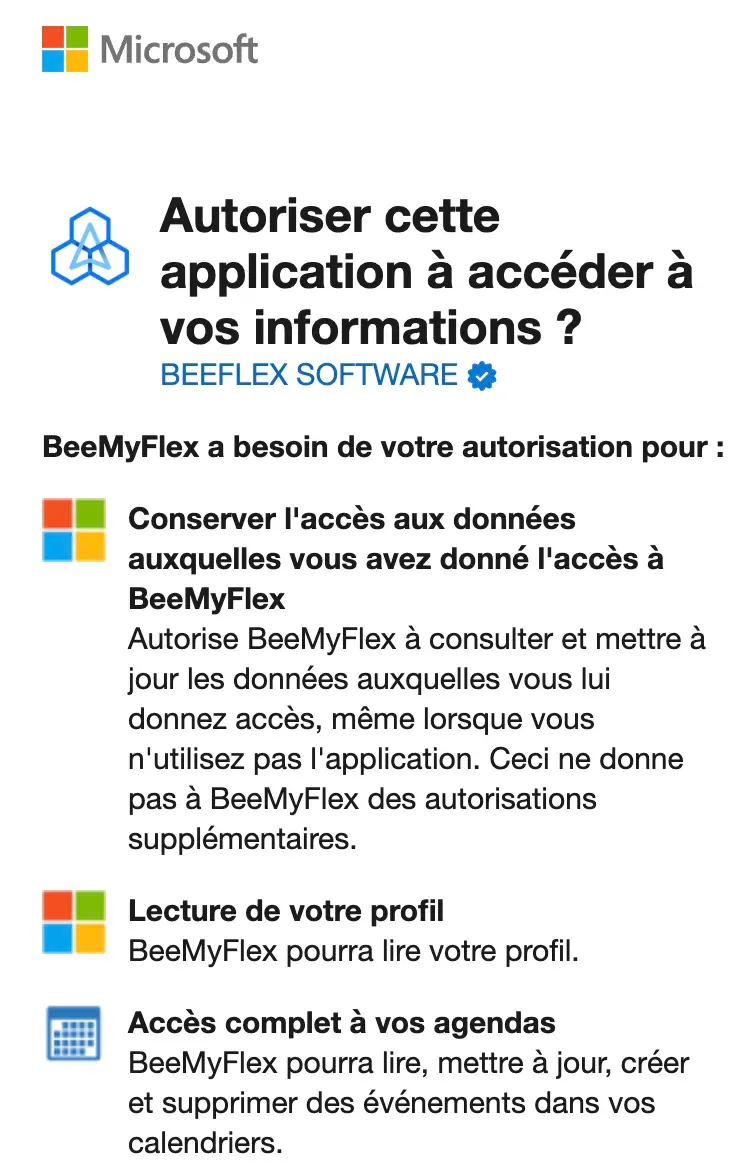
👉 Allow the app to access your information.
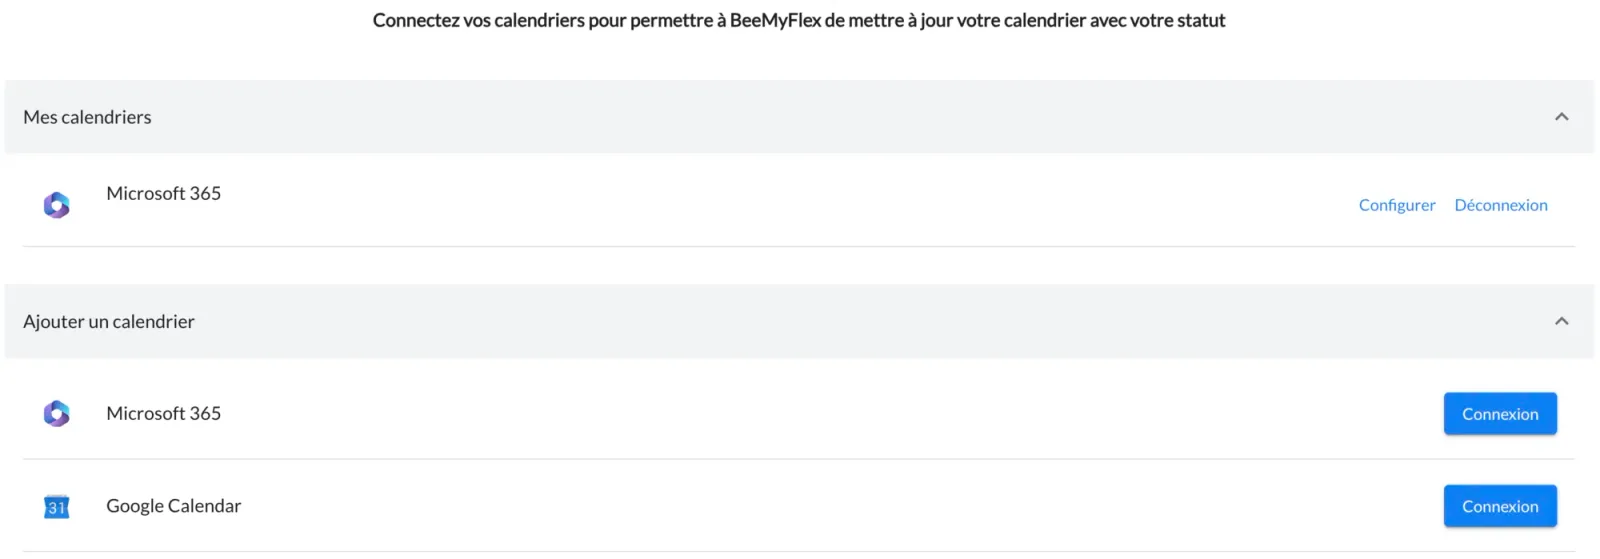
✅ Your Outlook Office 365 calendar is now connected to your BeeMyFlex calendar.
📌 When you indicate in BeeMyFlex that you are working from home for a day, an appointment is automatically created in your Outlook Office 365 calendar:
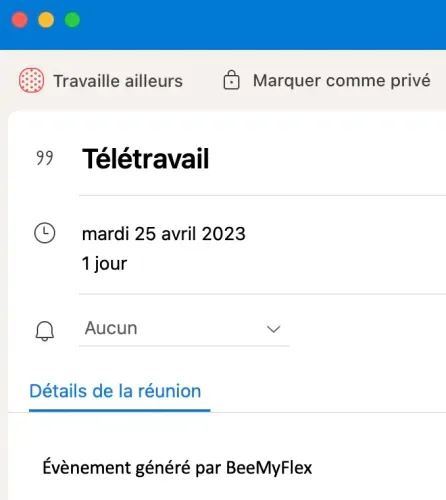
This appointment is automatically created in Outlook Office 365.
📌 The same applies when you indicate that you are traveling, in the office, or absent for a day.
📌 When you indicate in BeeMyFlex that you are working from home for a half-day, a half-day appointment is automatically created in your Outlook Office 365 calendar. For example, if the half-day concerns the morning:
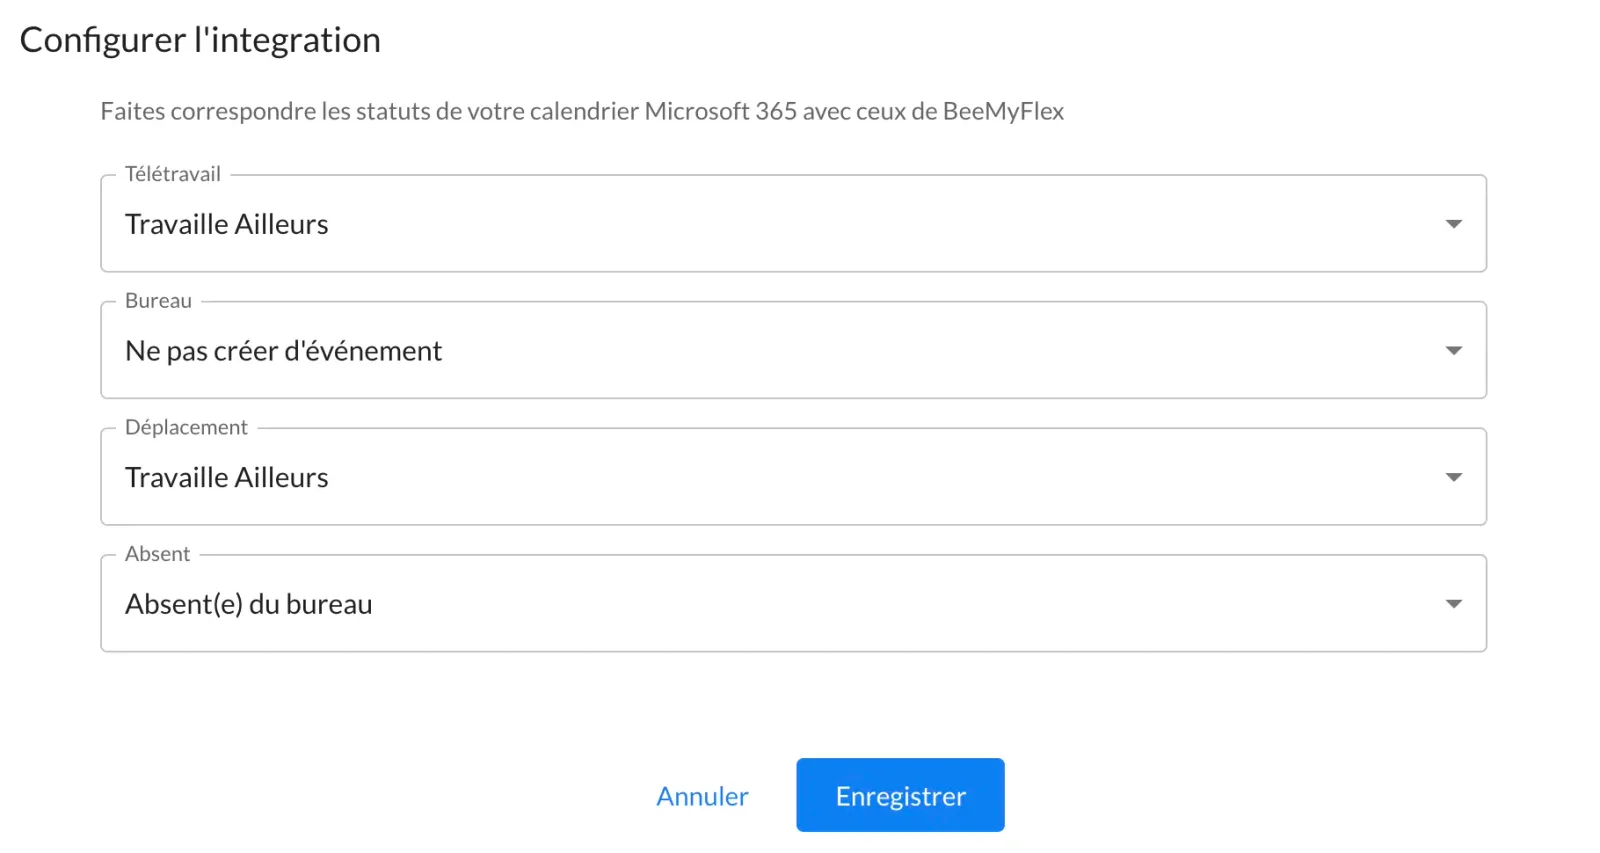
📌 You can customize the Outlook Office 365 statuses with those from BeeMyFlex by clicking on Configure.

ℹ️ In Outlook, there are 5 statuses:
- Available
- Busy
- Working elsewhere
- Tentative
- Out of office
ℹ️ You can also choose not to create an event in Outlook Office 365 for a given status.
📌 You can remove the connection of your Outlook Office 365 calendar from your BeeMyFlex calendar at any time by clicking on My Integrations in the main menu.
Access your personal information
We will see together, in a few seconds, how to modify your personal information in BeeMyFlex.
To get there :
👉 Click on your profile picture or initials at the top right of the screen and select My profile.
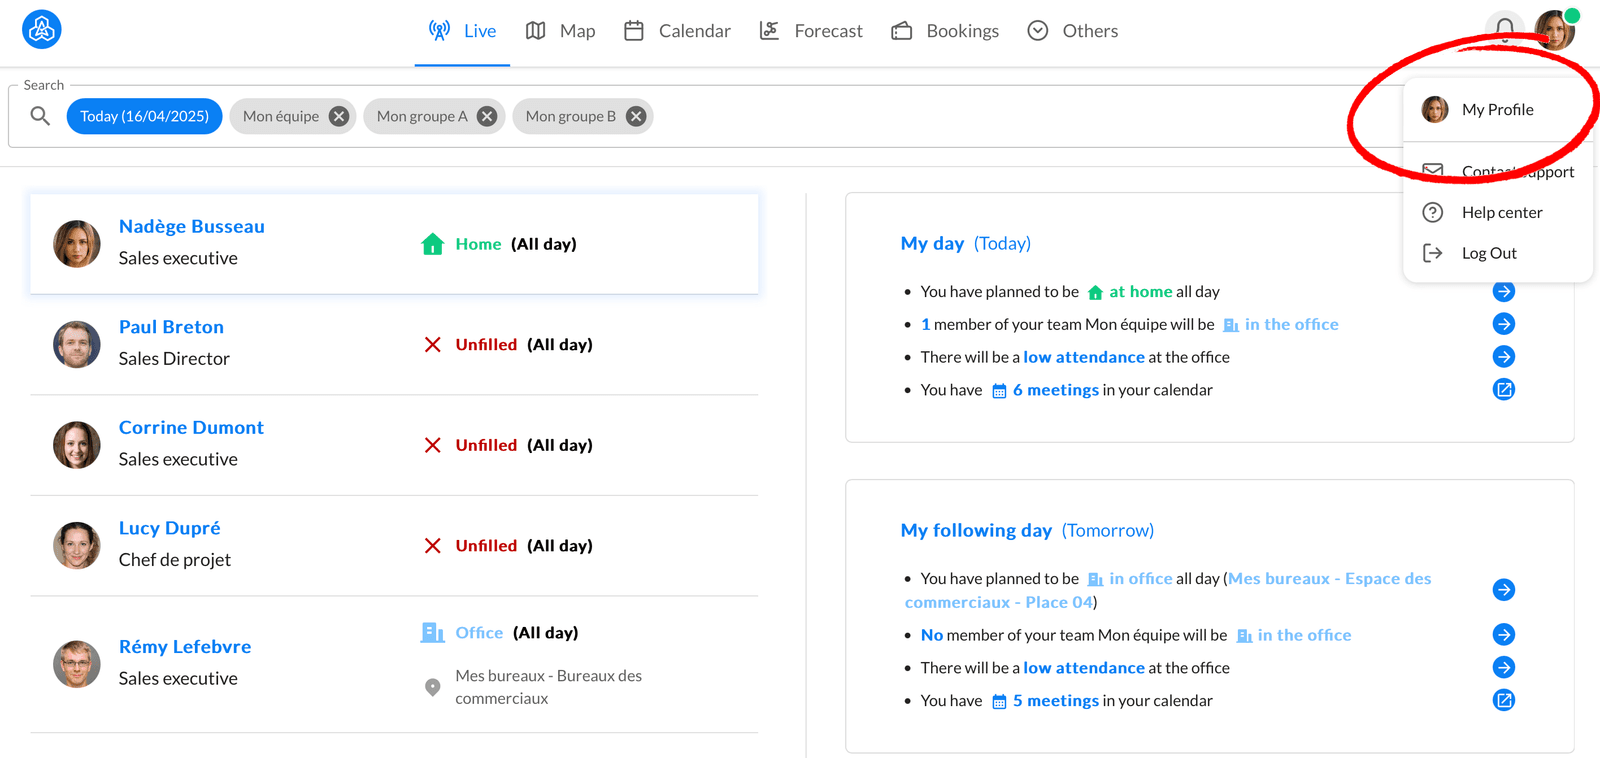
You will find your grouped information in each section. Some can only be modified by your administrator.
💡 Consider adding a photo of yourself to your profile; it helps your colleagues easily find you.

Your email address cannot be changed as it is your unique id.

1️⃣ The section Identity collects your personal information.
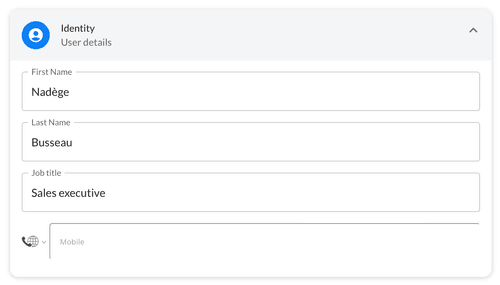
🖋️ First name and last name are modifiable and mandatory information.
⚠️ If your configuration is connected to your HRIS, this information is automatically updated. Any manual changes are automatically overwritten by the data import from your HRIS.
🖋️ Job title and Mobile are modifiable and optional information.
2️⃣ The section Roles and Memberships, for its part, groups your information within your organization.
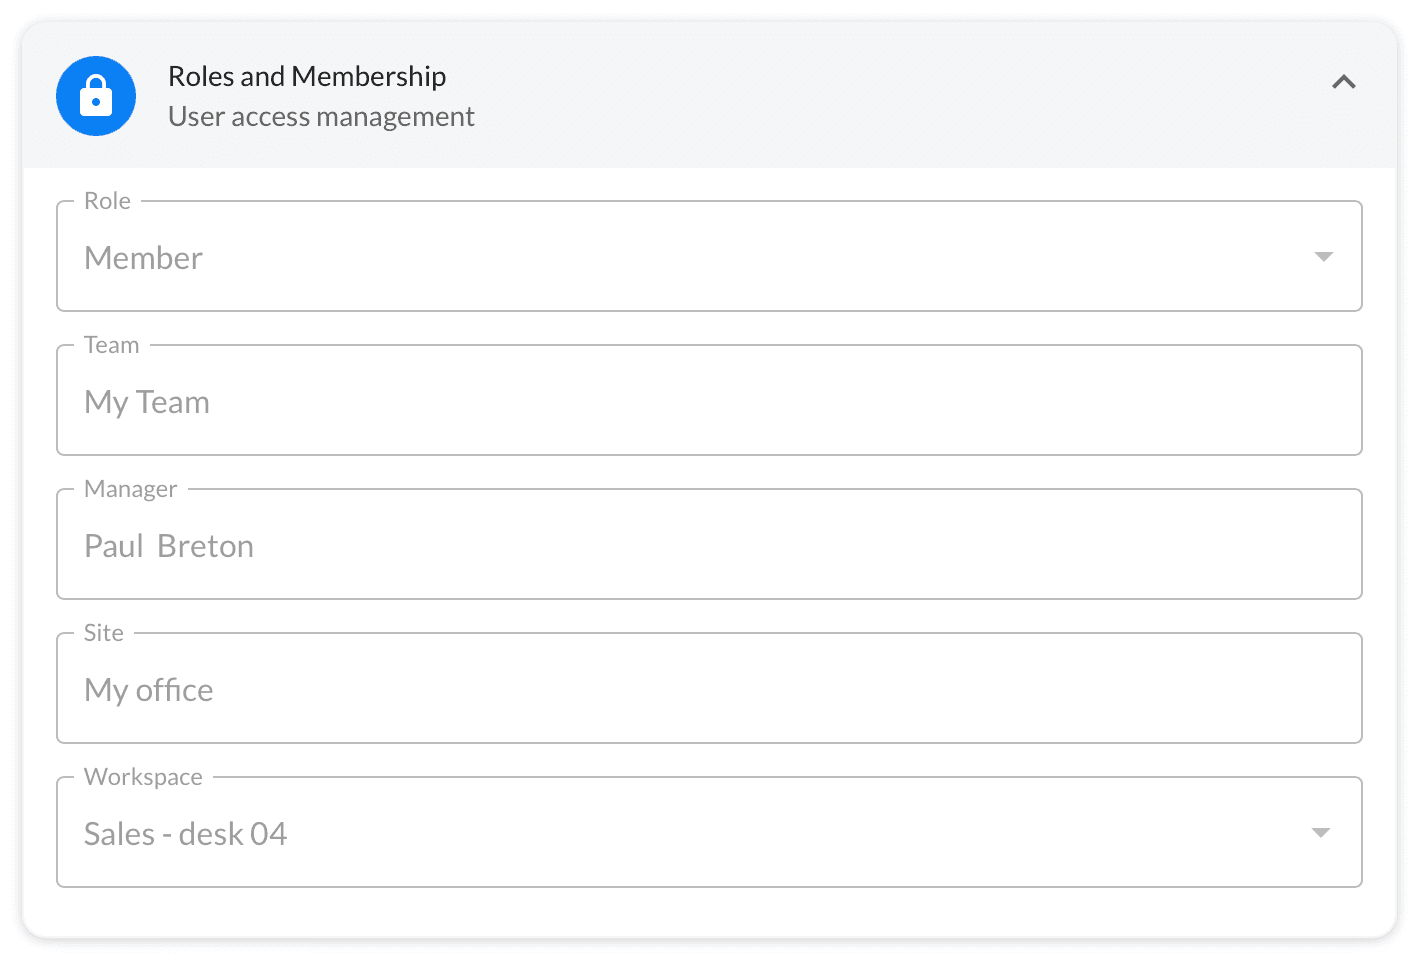
🔏 This information can only be modified by your administrator.
⚠️ If your team is incorrect, inform your administrator.
3️⃣ The section Settings allows you to better coordinate your organization.
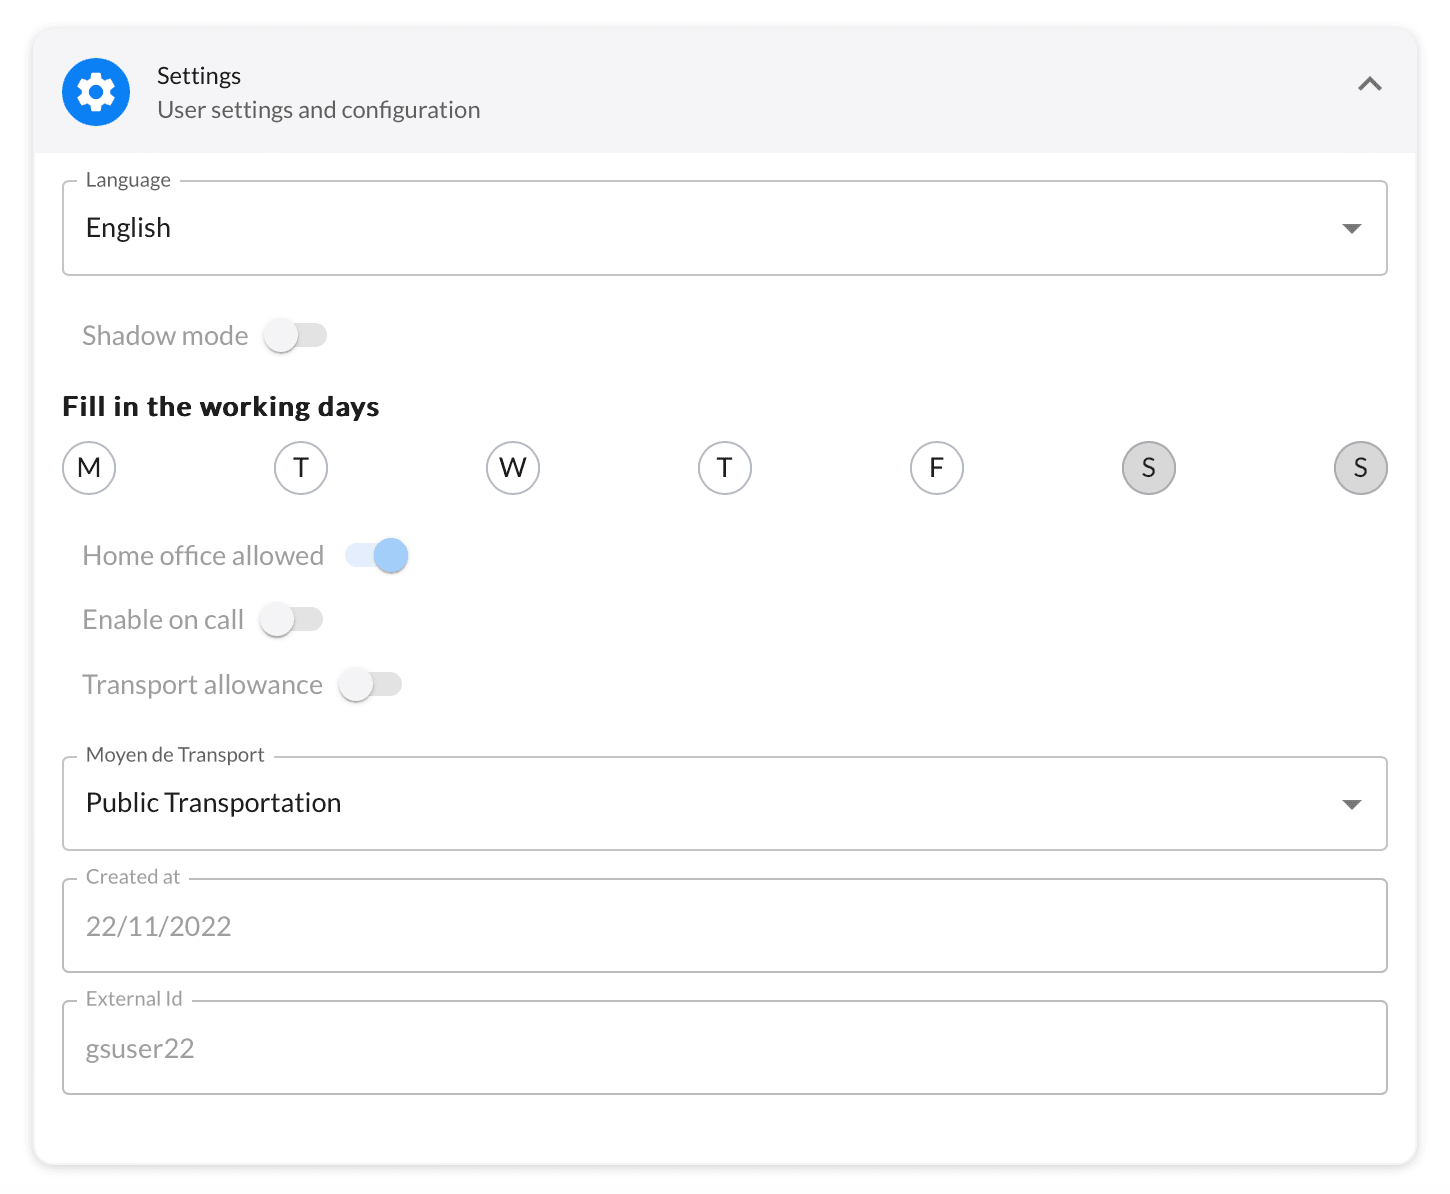
🖋️ You can change the language and choose from:
- French
- English
- Dutch
- German
- Italian
- Spanish
🖋️ You can choose your primary mode of transportation (this information is not currently used in BeeMyFlex).
🔏 All other information can only be modified by your administrator.
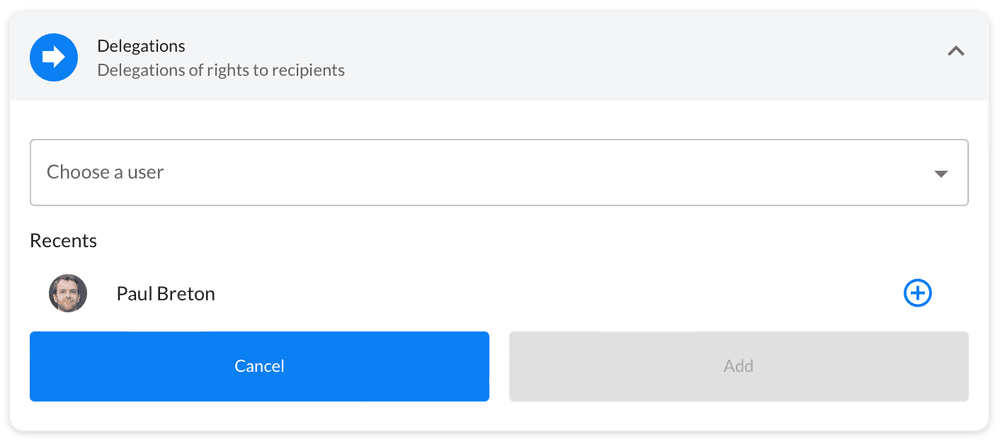
4️⃣ The Delegations section allows you to delegate your account to one of your colleagues for a period of time.
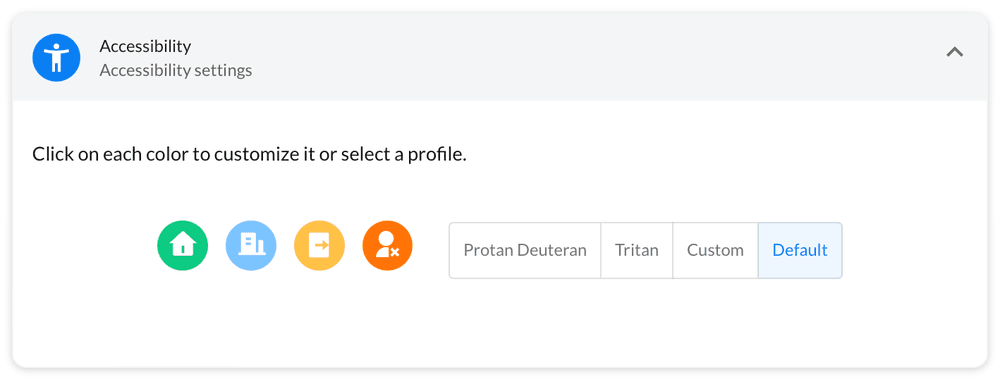
5️⃣ The Accessibility section allows you to change the colors of presence types in case you are colorblind.
Invite my colleagues to meet at the office
Let’s take a few seconds to see how to invite your colleagues to join you at the office using your BeeMyFlex app.
▶️ Once your calendar is filled in, you can invite one or more colleagues to join you at the office.
To invite your colleagues:
👉 Go to your Forecast page.
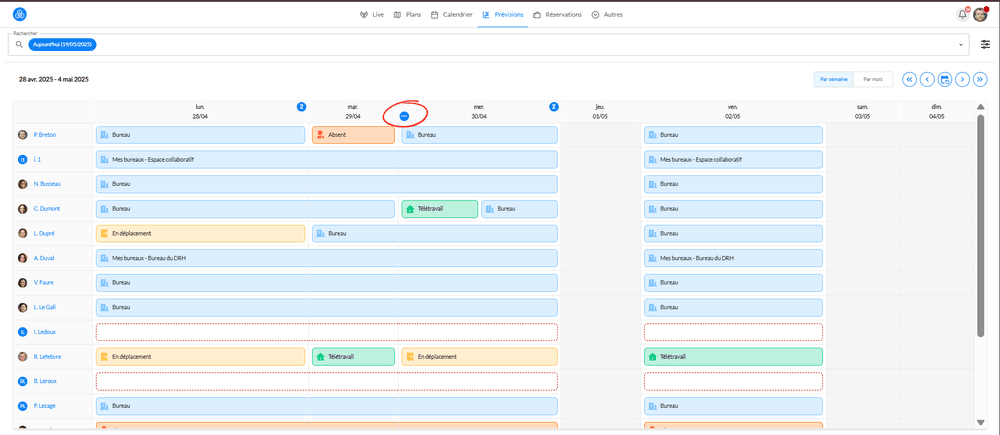
👉 Click the button that appears when you hover your mouse over the date bar in the forecasts (e.g. "Wednesday").
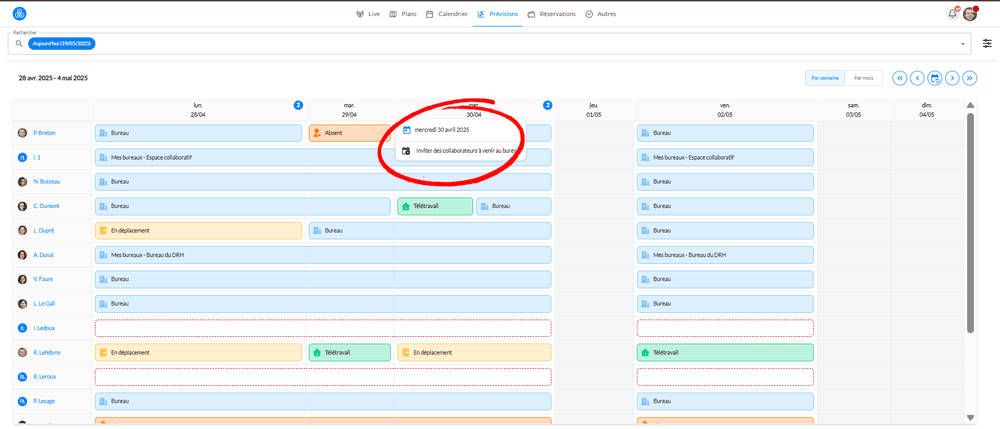
👉 The next page will appear. You can fill in the information and send the invitation to the selected recipient.
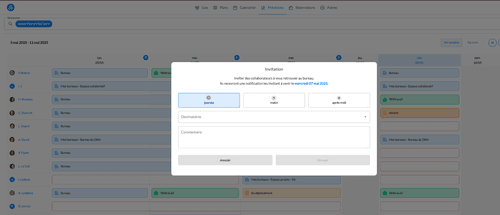
✅ The selected teammates will receive a notification to inform them.
Filter the display of my Live view, floor plan, and forecasts based on my teams and groups
In just a few seconds, we’ll show you how to customize your display based on your preferences in the different tabs of your BeeMyFlex app.
To apply a filter:
👉 Click on the icon to the right of your search bar in the tab you want to filter.

👉 On the new page that appears, select the teams and groups you want to display. Once you've made your selection, click Save.
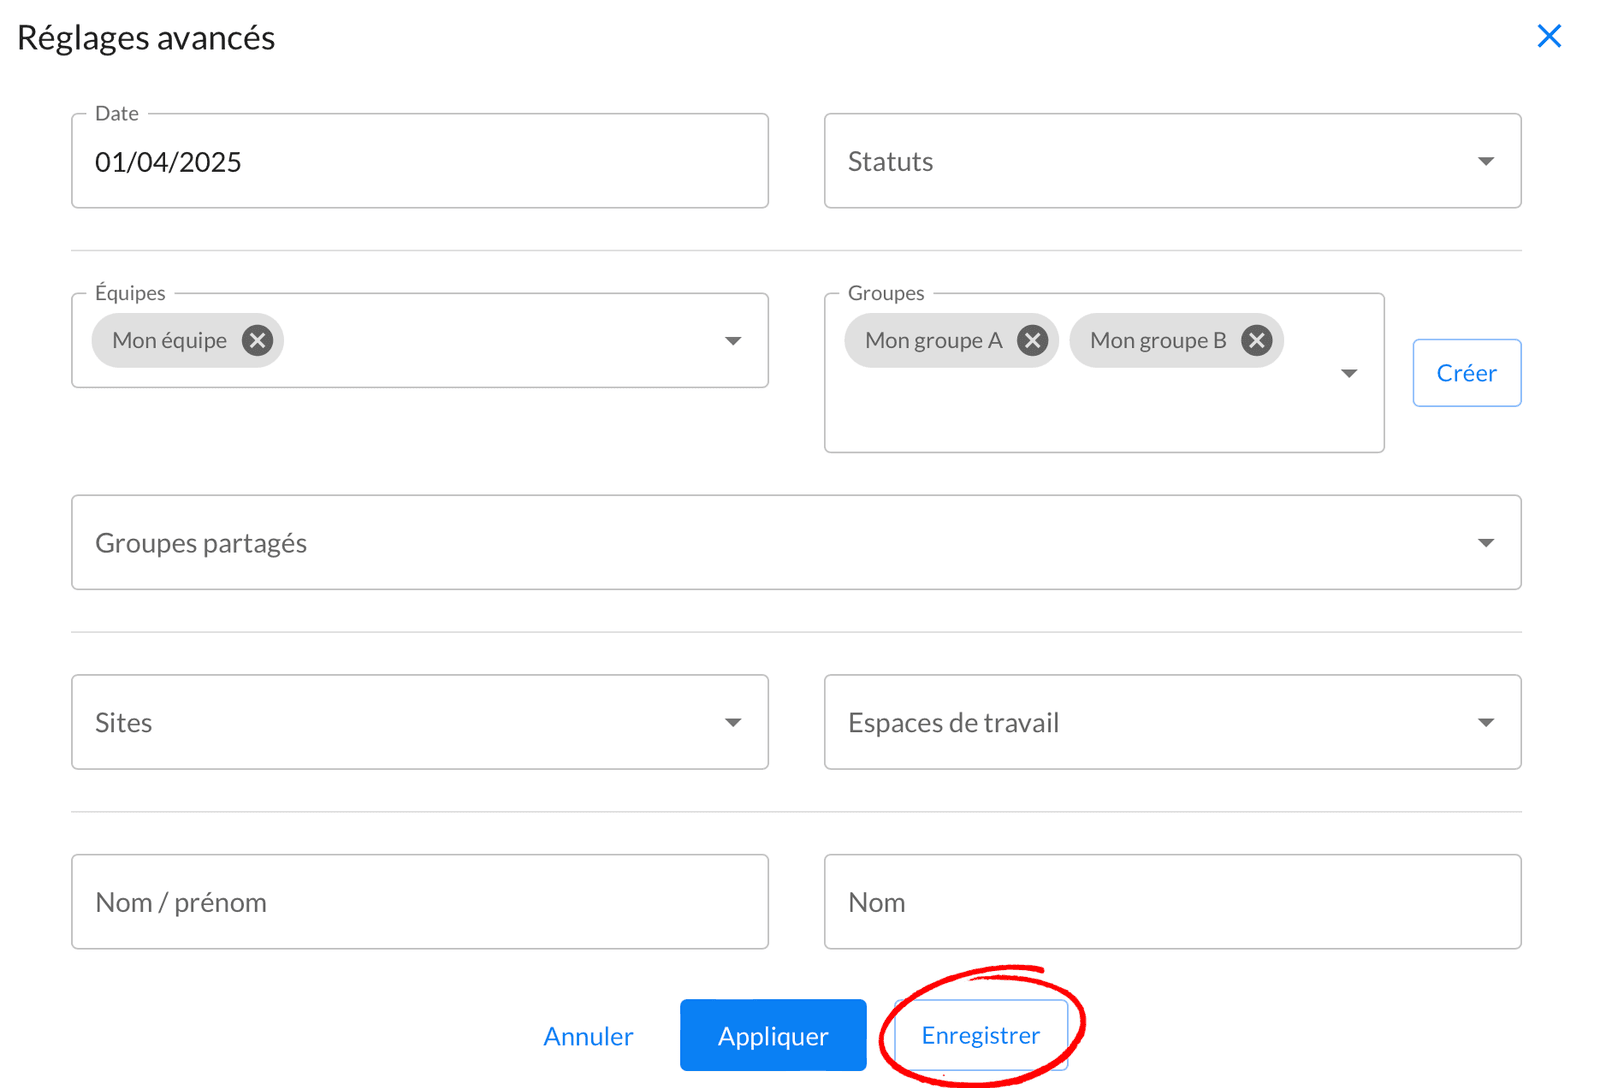
👉 You’ll be automatically redirected to the previous page, now with your filters applied.
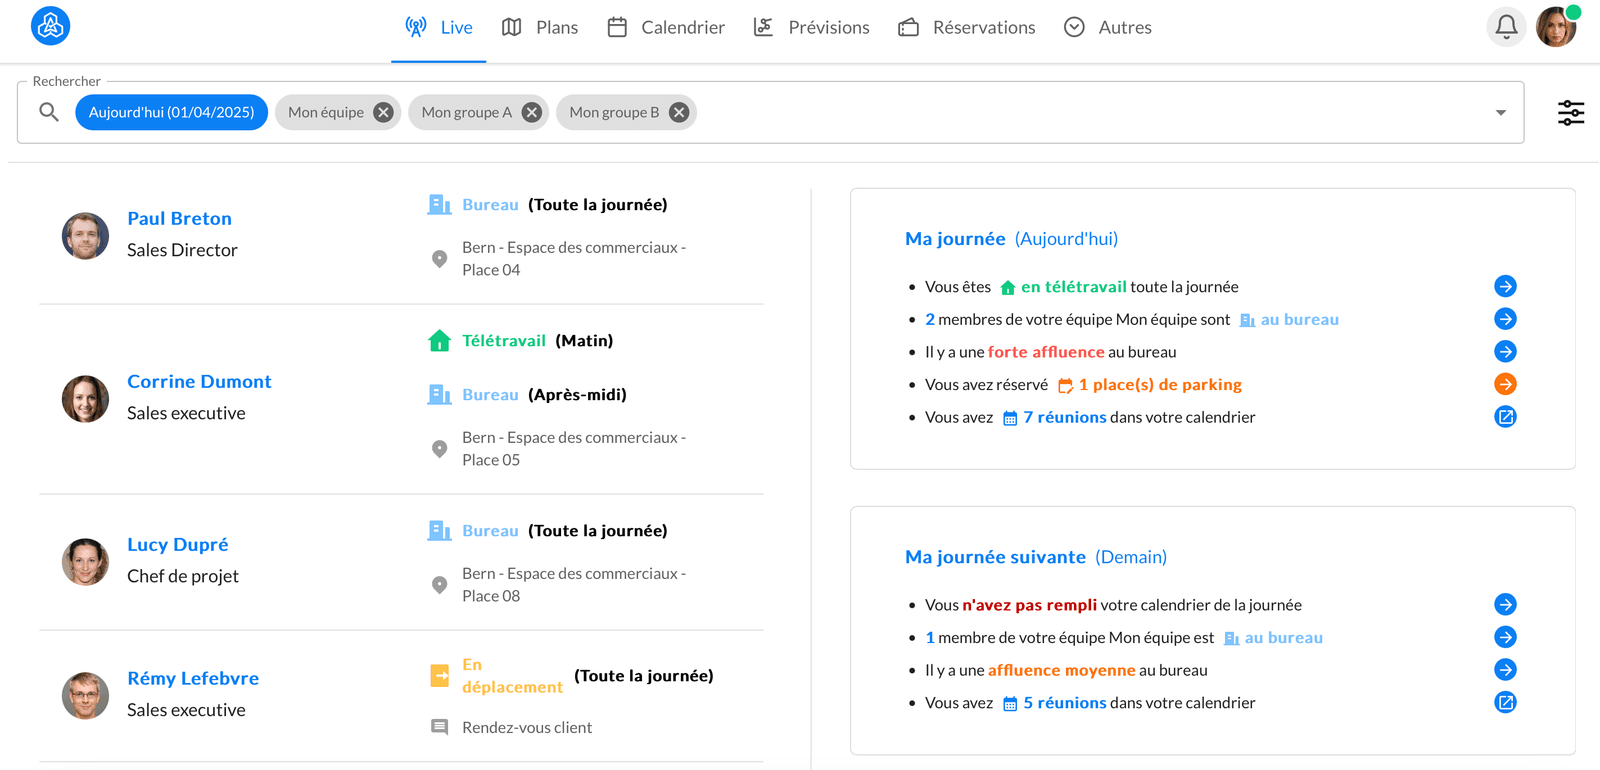
✅ Your default filters are now automatically applied.
Set up your typical week and duplicate it using recurrence
Let’s go through how to duplicate your typical week in your BeeMyFlex calendar.
To duplicate your typical week in the calendar:
👉 Select a day from your typical week and click the button on the right to display the list of recurrence options.
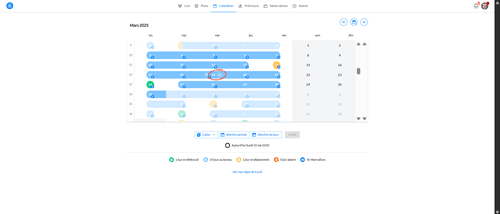
👉 The following list appears. Use "Repeat the day" to copy each day until a predefined date. Select "Repeat the week" to copy certain days of the week to the following weeks.
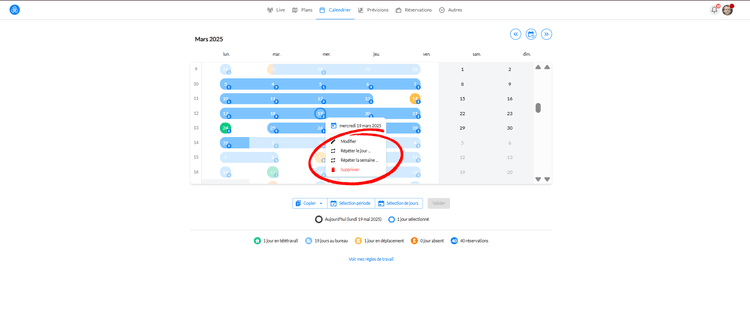
👉 When selecting "Repeat the week", the next page appears, allowing you to repeat this typical week on the following ones.
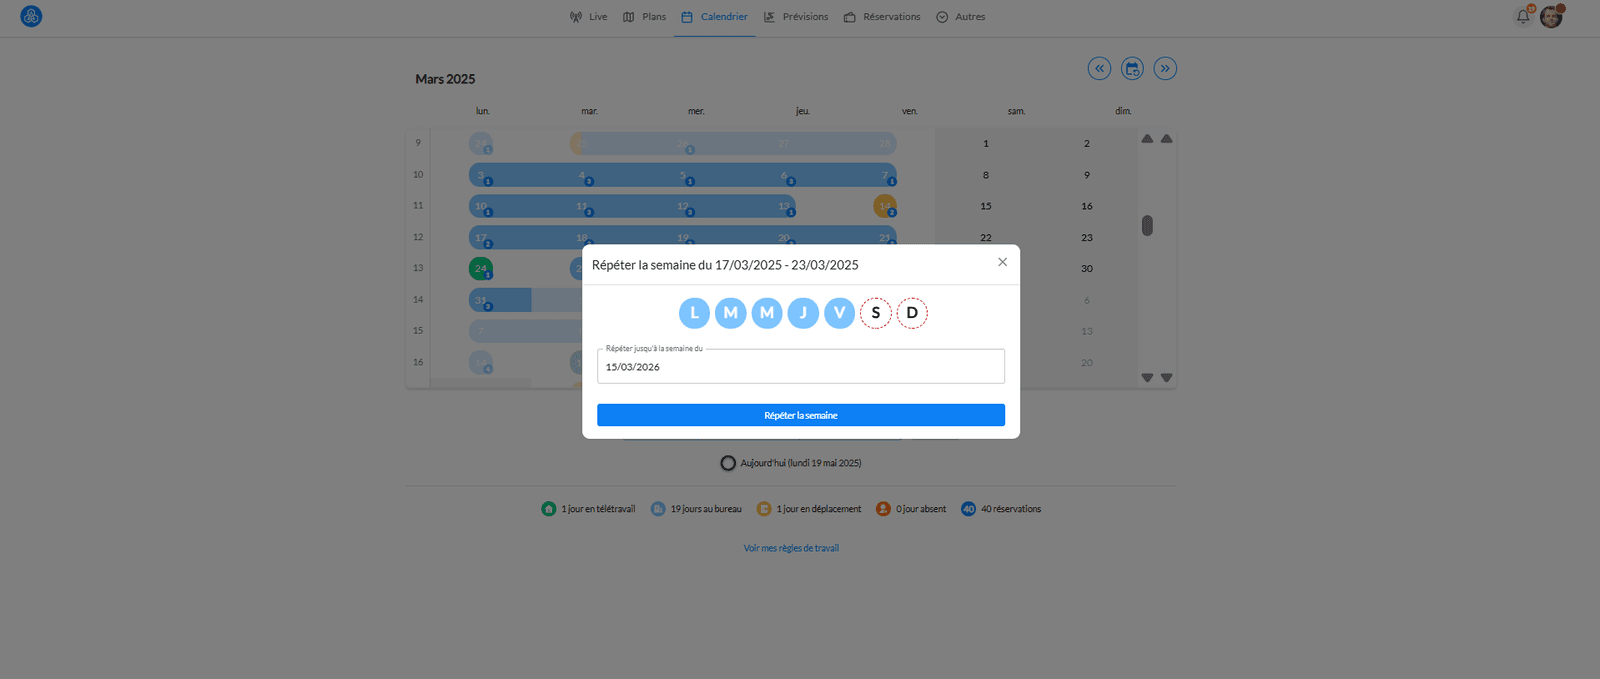
✅ You now know how to organize your weeks efficiently.
Create custom groups
We will see together in a few seconds how to create a Band dans BeeMyFlex.
▶️ You can create work groups by adding the relevant colleagues. This allows you to display your groups in Live, Forecast, and Map.
To create a group :
👉 Click on Others in the navigation bar and select Groups.
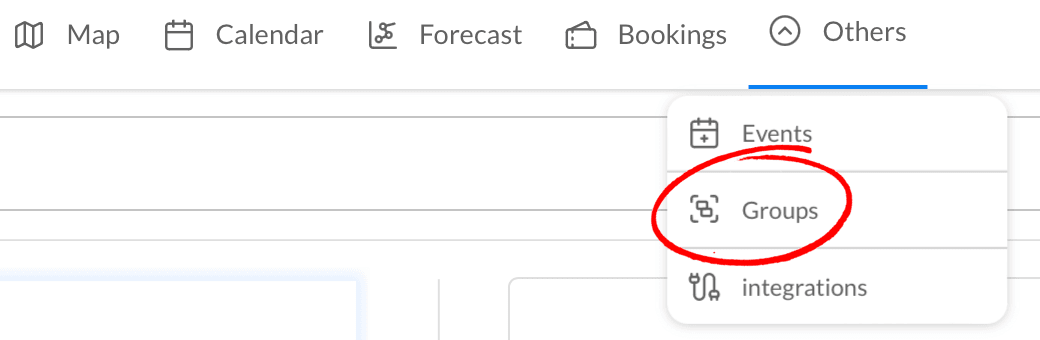
👉 On the new page, click Create en haut à gauche de votre écran.
👉 You can now give a Name to your group, and add a Illustration, if you wish.
👉 After clicking on Save, all you have to do is add the collaborators of your group by clicking on No attached collaborator.
👉 You can finally select the collaborators to add by clicking on the button to the right of their name.
✅ Your group is now created, and you can always modify it later.
Create rules about teleworking
We will see together in a few seconds how to create a Rule in BeeMyFlex.
ℹ️ This feature is only accessible by an Administrator and can be accessed by a Manager if the Administrator allows it in the configuration.
To get there:
👉 Click on your profile picture or initials at the top right of the screen and select Rules.
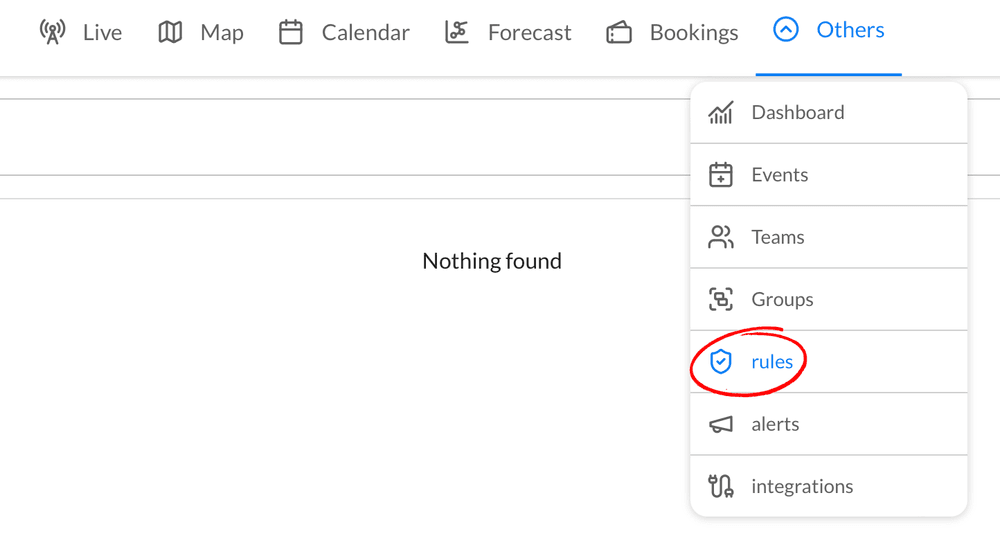
👉 Click on Create at the top left of your screen.
1️⃣ You can first give a Name to your rule.
2️⃣ Select the Rule type you want to configure.
3️⃣ Enter the Value to apply.
4️⃣ Choose one or more Recipients concerned.
⬇️ A rule that applies to Everyone has the lowest priority.
⬇️ A rule that applies to a Shared Group has a higher priority than the one that applies to Everyone.
⬇️ A rule that applies to a Team has a higher priority than the one that applies to a Shared Group.
⬇️ A rule that applies to a Collaborator has a higher priority than the one that applies to their Team.
📌 If you want your employees to be able to override the rule, select With exemption.
📌 If you want the rule to be blocking, then select Without exemption.
📌 If you want the rule to apply only under certain conditions, select the relevant value.
✅ Once saved, the rule applies immediately.
Create Your Team
Hello, and welcome. In just a few seconds, we will see together how to create your Team and assign your collaborators in BeeMyFlex.
ℹ️ This feature is only accessible by a Manager or an Administrator.
To access it:
👉 Click on your profile picture or initials at the top right of the screen and select My teams.
👉 On the new page, click on Create at the top left of your screen.
👉 You can now give a Name to your team and add an Illustration, if you wish.
👉 After clicking Save, all that’s left is to add collaborators to your team by clicking on No assigned collaborator.
⚠️ If you can’t find some of your collaborators, click on the filter at the top right of the search bar and select Show all – you will then see all collaborators and their assigned team.
If a collaborator is already assigned to another team, you can inform that team's Manager or your Administrator to take the necessary action.
Once you have assigned collaborators to your team:
1️⃣ You can create Rules and apply them to your team.
2️⃣ You can access your team's information in Live view, Forecasts, and Indicators.
Granting delegation in case of absence
Hello, and welcome. In just a few seconds, we will see together how to grant Delegation in case of absence in BeeMyFlex.
ℹ️ This feature is useful for a Manager or an Administrator.
To access it:
👉 Click on your profile picture or initials at the top right of the screen and select My profile.
👉 On this new page, select the Delegations section, then click on the Add a delegation button.
👉 You can now choose the collaborator to whom you want to delegate, and optionally set a specific period.
⚠️ Don't forget to click the Save button at the bottom of your profile for the changes to take effect.
📌 During this delegation period, the delegate will be able to act on your behalf by clicking on their photo or initials at the top right of the screen and selecting your name.
📌 They will also receive all your notifications.
Advanced Settings – Daily Export of Exceptions
You can enable an automatic daily export to receive by email a CSV file containing all exceptions declared within the last 24 hours.
ℹ️ This feature is only accessible to an Administrator.
To access it:
👉 Click on your profile picture or initials in the top right corner of the screen and select the name of your organization.
👉 On the new screen, click on Advanced Settings at the bottom of the page.
👉 Select the Daily Export of Exceptions section.
👉 Enter the email addresses of the recipients who will receive the daily export.
✅ Save your settings.
Advanced Settings – Custom Fields
ℹ️ This feature is only accessible to an Administrator.
In this section, you can create custom fields for each attendance status.
To access it:
👉 Click on your profile picture or initials in the top right corner of the screen and select the name of your organization.
👉 On the new screen, select the Advanced Settings section at the bottom of the page.
ℹ️ The settings for custom fields are located in the Custom Fields section.
Access the Organization Settings
To access the organization settings, make sure you have the Administrator role.
👉 Click on your profile picture or initials in the top right corner of the screen and select the name of your organization.
✅ You will then access your organization’s administration module.
ℹ️ To check if you have the Administrator role, go to your profile and look under the Roles and Membership section.
Configuration Settings
ℹ️ This feature is only accessible to an Administrator.
To access it:
👉 Click on your profile picture or initials in the top right corner of the screen and select the name of your organization.
👉 On the new page, select the Configuration section.
On this screen, you can define the configuration settings for your organization:
1️⃣ Working days:
Select your organization’s working days.
2️⃣ Number of past days editable:
Define the number of past days for which it is still possible to modify schedules.
📌 Employees can edit their past schedules.
📌 Managers can edit the past schedules of employees in their teams.
3️⃣ Notice period (in days):
Define a number of days beyond which managers can no longer modify their employees’ schedules.
4️⃣ Reminder period (in days):
Employees who have not completed their schedules for the upcoming days (number of days you set) will automatically receive a reminder notification.
5️⃣ Message to contact your support:
You can customize a message that appears in the users’ profile (for example: “If any of your information is incorrect, click here to report it to your administrator.”). A link allows users to access the customer support form.
Advanced Settings – Contacts
ℹ️ This feature is only accessible to an Administrator.
In this section, you can enter the email addresses of the contacts responsible for your organization.
To access it:
👉 Click on your profile picture or initials in the top right corner of the screen and select the name of your organization.
👉 On the new screen, click on Advanced Settings at the bottom of the page.
👉 Select the Contacts section.
1️⃣ Enable the feature.
There are several types of contacts:
2️⃣ Administrative Contact(s): your managers that the BeeMyFlex team may reach out to.
3️⃣ Billing Contact(s): your managers who will receive the invoices for your BeeMyFlex subscription.
4️⃣ Support Contact(s): your managers who will receive support requests from your users and handle them.
5️⃣ Import Contact(s): your technical managers who will receive execution reports from the BeeMyFlex connectors you have set up.
✅ Save your settings.
Advanced Settings – User Consent
You can provide a text to inform your users about the processing of their personal data in compliance with regulations.
Here is an example:
Your organization requires your consent to store your personal data and process it securely. No information will be sold or shared with third parties, except for the technical execution of additional services.
In accordance with national and European regulations, you have the right to access, rectify, and delete your data, which you can exercise by contacting:
rgpd@your-organization.com
ℹ️ This text is displayed when a user logs in for the first time.
✅ Their consent is automatically recorded.
ℹ️ This feature is only accessible to an Administrator.
To access it:
👉 Click on your profile picture or initials in the top right corner of the screen and select the name of your organization.
👉 On the new screen, click on Advanced Settings at the bottom of the page.
👉 Select the User Consent section.
1️⃣ Enable the feature.
2️⃣ Enter the consent text.
3️⃣ Enter the confirmation text.
✅ Save your settings.
Advanced Settings – Remote Work Allowance
You can enable and configure a flat-rate remote work allowance.
ℹ️ In the Indicators section, a dashboard displays the allowance to be paid each month for every employee.
ℹ️ This feature is only accessible to an Administrator.
To access it:
👉 Click on your profile picture or initials in the top right corner of the screen and select the name of your organization.
👉 On the new screen, click on Advanced Settings at the bottom of the page.
👉 Select the Remote Work Allowance Amount section.
1️⃣ Enable the feature.
2️⃣ Select a currency.
3️⃣ Enter a value.
✅ Save your settings.
Create Your Sites and Workspaces
ℹ️ This feature is only accessible to an Administrator.
To access it:
👉 Click on your profile picture or initials in the top right corner of the screen and select the name of your organization.
👉 On the new page, select the Sites and Workspaces section.
1️⃣ To create a Site, click on the New Site button in the top left corner of the screen.
👉 You can now give your site a name and add an illustration.
👉 If you have implemented a Parking Reservation Service and your site is concerned, you can enable the Parking available option.
✅ Your Site is now created.
ℹ️ A Site is a group of workspaces.
👉 To add your workspaces, simply click on the New Workspace button.
2️⃣ To create a Workspace, click on the New Workspace button on the right side of your Site details.
👉 You can now give your workspace a name and add an illustration if you wish.
ℹ️ This illustration will appear in the Live View and Forecasts of employees who are in the office.
👉 Capacity refers to the number of seats in this workspace.
👉 You can add a Description.
👉 Specify the list of teams or employees who can access this workspace. Otherwise, choose Everyone to give open access.
👉 If this workspace is accessible to people with reduced mobility, you can enable the Accessible for people with reduced mobility option. The symbol will then be visible when an employee chooses their workspace.
✅ Your Workspace is now created.
👉 You can also assign it by default to certain employees. To do this, go to the user’s profile, then click on the Role and Membership section.
Create Your Users
Hello and welcome! Let’s take a few seconds to see how to add new users in BeeMyFlex.
ℹ️ This feature is only accessible to an Administrator.
To access it:
👉 Click on your profile picture or initials in the top right corner of the screen and select the name of your organization.
👉 On the new page, select the Users section to access the list of all users in your organization.
👉 To add new users, simply click on the Create button and enter their email addresses in the corresponding field.
✅ Your colleagues will then receive an invitation to join BeeMyFlex.
⚠️ For organizations using the SSO (Single Sign-On) authentication system, make sure each user’s email address matches their email address in the internal directory.
ℹ️ For organizations using an HRIS integration with BeeMyFlex, users are automatically created, archived, and updated directly by the system. However, you can still manually add external users by following the method above.
Create Your Teams
ℹ️ This feature is only accessible to an Administrator.
💡 Good news for administrators: you no longer need to delegate access to act on behalf of your managers and manage their teams.
✔️ You now have a dedicated screen to view all the teams in your organization, and you have full control to edit them!
To access it:
👉 Click on your profile picture or initials in the top right corner of the screen and select the name of your organization.
👉 On the new page, select the Teams section.
✅ You will now see the list of all teams in your organization.
ℹ️ You can create, archive, and edit all teams.
Create Your Rules
ℹ️ This feature is only accessible to an Administrator.
💡 Good news for administrators: you no longer need to delegate access to act on behalf of your managers and manage their rules.
✔️ You now have a dedicated screen to view all the rules in your organization, and you have full control to edit them!
To access it:
👉 Click on your profile picture or initials in the top right corner of the screen and select the name of your organization.
👉 On the new page, select the Rules section.
✅ You will now see the list of all rules in your organization.
ℹ️ You can create, archive, and edit all rules.
Add Services in BeeMyFlex
Services allow you to integrate your other everyday applications, such as:
👉 Your meeting room booking application
👉 Your parking space booking application
👉 Your coworking space booking application
👉 Your business travel planning application
👉 Your accommodation booking application
And many more...
For more information, please contact us.
First Login – I Haven’t Received an Invitation to Join BeeMyFlex
No problem! No need to check your spam folder.
Simply click on the following link: Access BeeMyFlex
You will be redirected to the following screen:
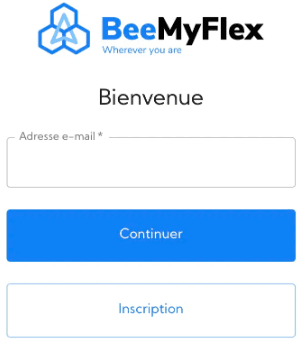
Now click on Sign Up.
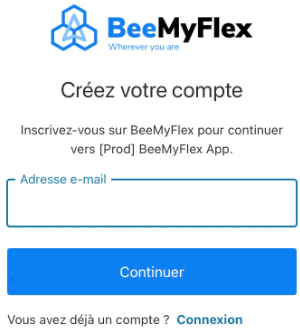
Enter your email address exactly as it was created in BeeMyFlex (👉 check this with your administrator) and click Continue.
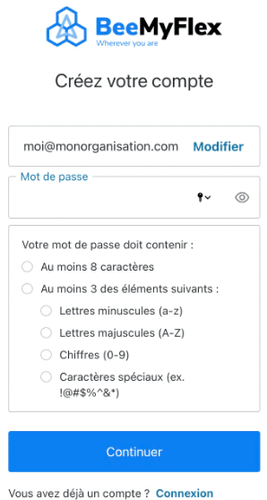
You can now set your password and click Continue.
ℹ️ Your password must meet standard security requirements.
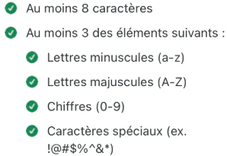
🚨 If you are redirected to the screen below, it means you haven’t successfully joined your organization. 🚨
Don’t worry! Here’s why and how to fix it:
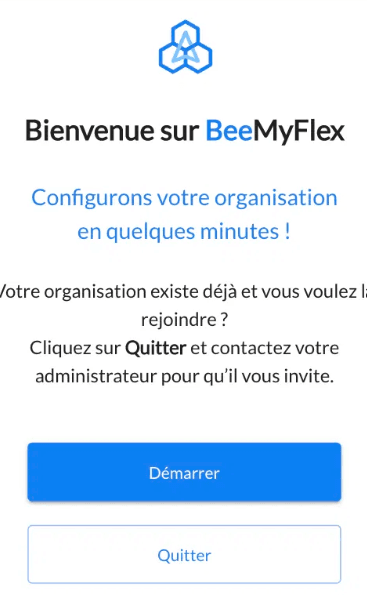
1️⃣ You may have entered your email address (login) incorrectly. It’s common to make mistakes with extensions.
2️⃣ Your account may not yet have been created by your administrator.
👉 First, click on the following link: Log Out
👉 Contact your administrator to make sure your account has been created with the correct email address.
👉 Try again by clicking on the following link: Access BeeMyFlex
✅ If everything is correct, you will then access your Profile for the first time:
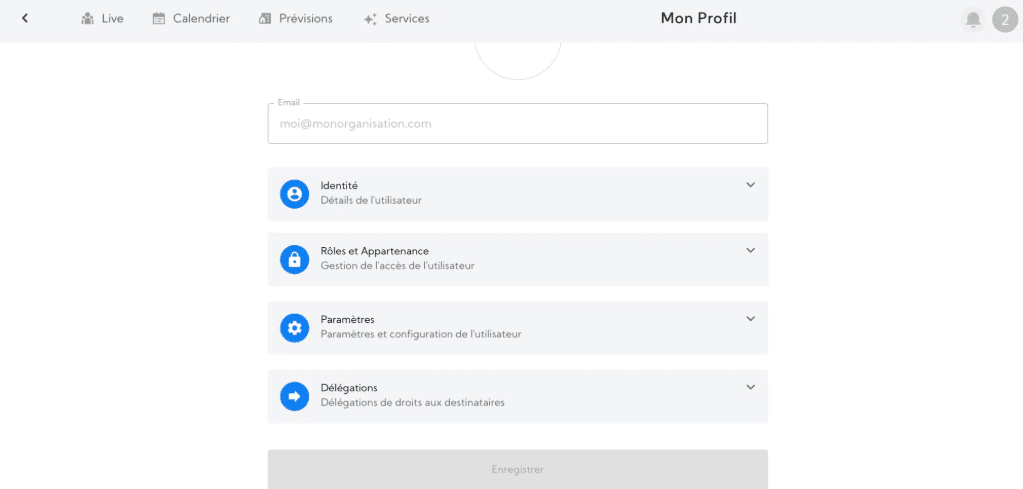
Simply fill in at least your First Name and Last Name and click Save.
✅ You can now access all the features of BeeMyFlex!
Login – How to Change My Password?
⚠️ For organizations using an SSO authentication system, please contact your administrator.
If your organization does not use an SSO authentication system, here is the method to follow:
To reset your password, simply log out of the application, then on the new screen, enter your email address (login) and click Continue.
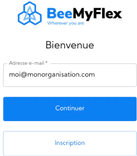
On the next screen, click on the Forgot password? link, then click Continue.
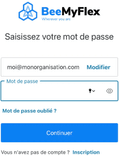
⚠️ Make sure you enter your email address correctly, and then click Continue.
You will then receive an email with a link to set your new password.
ℹ️ Your password must meet standard security requirements.
Login – My Username or Password Is Incorrect
⚠️ For organizations using an SSO authentication system, please contact your administrator.
If your organization does not use an SSO authentication system, when you try to log in with your username and password, if the following message appears:
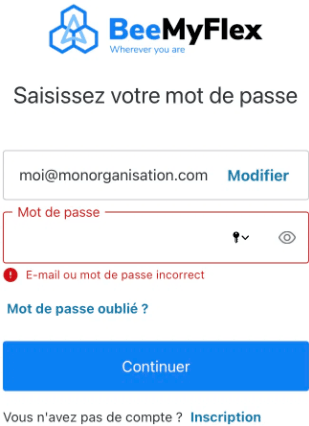
1️⃣ Check the syntax of your email address (login), especially its extension (people often confuse .com with other extensions).
2️⃣ Click on the Forgot password? link.
3️⃣ If you do not receive an email to reset your password, it is likely that your account has not been created. In this case, please contact your administrator.
Login – My Account Has Been Archived – What Should I Do?
When you try to log in, do you see a message informing you that your account has been archived?
👉 Contact your administrator so they can reactivate your account.
SSO Login – I’m Being Asked for a Password Even Though I Should Be Recognized with My Username
Your organization has implemented SSO (Single Sign-On) authentication.
When you enter your email address, the system should redirect you directly to your organization’s directory to validate your authentication and then take you to the application.
🚨 If you enter your email address and are redirected to the following screen 🚨
1️⃣ Check the syntax of your email address (username), especially its extension (people often confuse .com with other extensions).
2️⃣ If you are sure your email address (username) is correct and you are still blocked on this screen, contact your administrator.
Login – What Should I Do If I Change My Email Address (Username)?
It is currently not possible to modify the email address of your account, which is used as your login for the application.
There are two options:
1️⃣ You can keep your current email address if you are certain that you will continue to receive emails at this address.
2️⃣ You can ask your administrator to archive your account and create a new one with your new email address. ⚠️ You will not be able to keep your calendar history.
Management – What Are the Differences Between a Team and a Group?
1️⃣ Groups
A group allows you to display the Live and Forecasts of employees belonging to cross-functional teams with whom you are working on a topic or project.
Anyone can create custom groups. These groups are not public and are not shared.
For example, if you are working on a bid with colleagues from different teams, you can create the group “Bid A” and associate the relevant employees.
ℹ️ If your organization has restricted access to Live and Forecasts so that you can only access your own team, the group management feature is then disabled. (Update 05/15/2023: this restriction no longer exists.)
Display – I Can’t Find My Team in Live or Forecasts
▶️ When you access Live or Forecasts, all employees of the organization are displayed, and the selector shows My Organization.
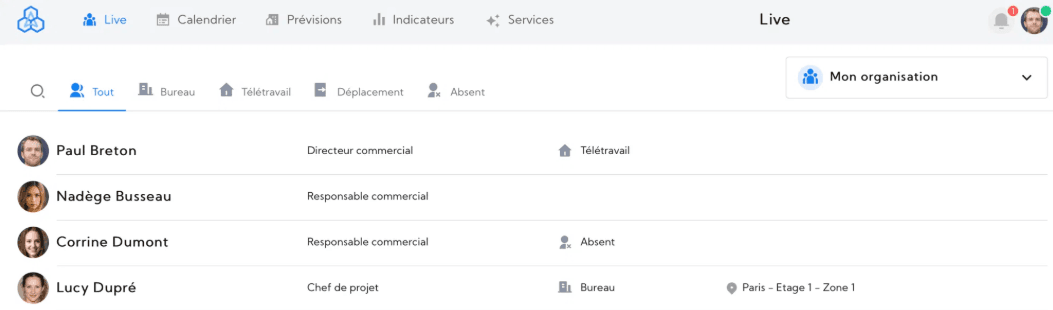
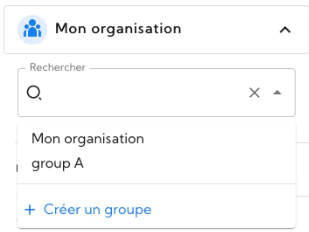
▶️ If you click on the selector, you can only choose My Organization and the Groups you have created.
👉 Go to your profile by clicking on your photo or initials in the top right corner of the screen, and check in the Roles and Membership section whether you are assigned to a Team and a Manager.
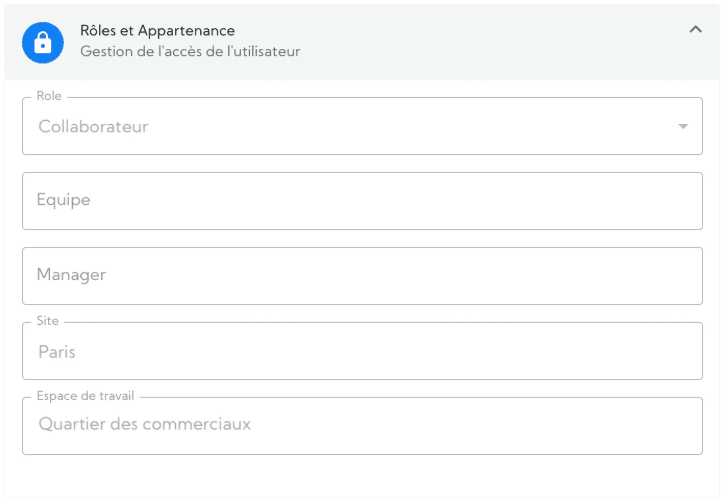
If this information is missing and it says Team and Manager are not set, contact your manager and/or your administrator.
They will be able to assign you to your team.
Display – I Can’t Find Some Team Members in Live or Forecasts
If you cannot find some of your colleagues when selecting your Team in Live or Forecasts, it is possible that they are not assigned to your team, or that their account has not been created (or has been archived).
In this case, you can notify your manager and/or your administrator.
Profile – I’m Not Assigned to the Right Team or Manager
If the colleagues displayed in Live or Forecasts are not in your team, and the team name shown in the selector at the top right is not yours, you are probably assigned to a different team than your own.
In this case, notify your manager and/or your administrator.
Calendar – My Default Workplace Does Not Appear When I Select a Day
When you set your status to Office in your Calendar, your default Site and Workspace are automatically filled in the Workplace field.
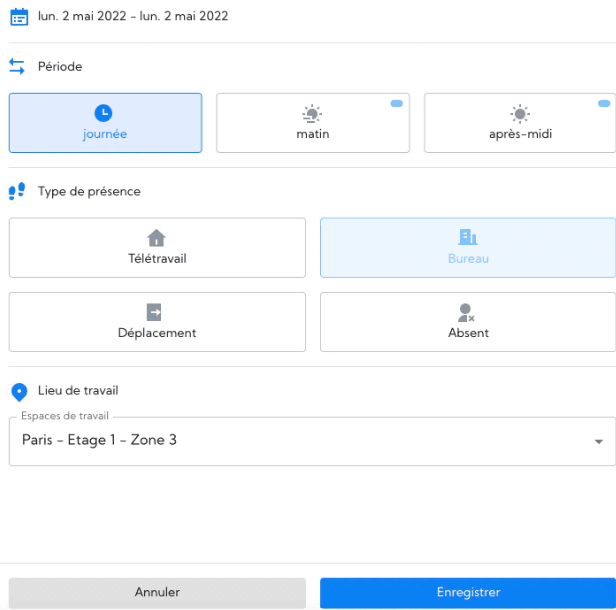
There are three reasons why your Site and Workspace might not be automatically filled:
1️⃣ Your default Site and Workspace are full on that day.
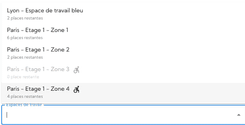
You can check this by opening the list of workplaces. Your Site and Workspace will appear in grey with the note 0 seats available.
In this case, you can either change your status or select another Workplace.
2️⃣ You are not assigned to a Site and Workspace.
👉 To check this, go to your Profile by clicking on your photo or initials in the top right corner of the screen, and verify in the Roles and Membership section whether you are assigned to a Site and Workspace.
If these two fields are empty and only show Site and Workspace, contact your administrator.
They will be able to assign you to a default Site and Workspace.
3️⃣ Your organization uses flex office, and no employees are assigned to a default Site and Workspace.
2️⃣ You are not assigned to a Site and a Workspace.
👉 To check this, go to your Profile by clicking on your photo or initials in the top right corner of the screen, and verify in the Roles and Membership section whether you are assigned to a Site and a Workspace.
If these two fields are empty and only show Site and Workspace, contact your administrator.
They will be able to assign you to a default Site and Workspace.
3️⃣ Your organization uses flex office, and no employees are assigned to a default Site and Workspace.
Calendar – The Remote Work Option Does Not Appear When I Select a Day
When you want to set your status to Remote Work in your Calendar and it does not appear:
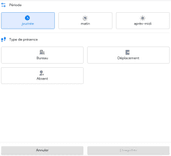
Your organization does not allow you to work remotely.
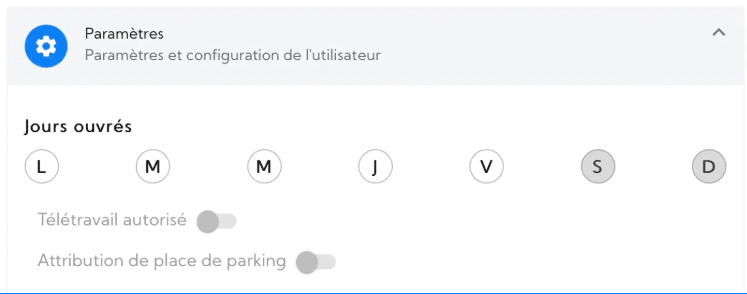
👉 To check this, go to your Profile by clicking on your photo or initials in the top right corner of the screen, and verify in the Settings section whether Remote Work Allowed is enabled.
If the toggle is on the left (as shown below), you are not authorized to work remotely.
If this is an error, contact your administrator.
Calendar – My Default Workplace Is Incorrect When I Select a Day
When you set your status to Office in your Calendar, your default Site and Workspace are not correctly filled in the Workplace field.
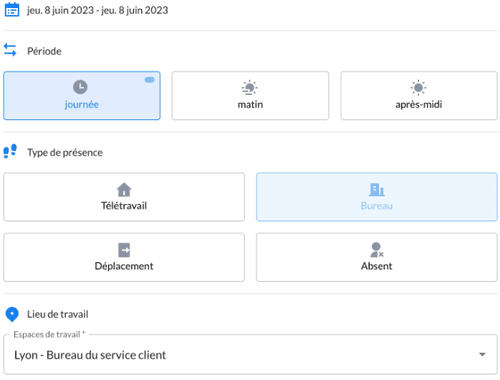
In this case, contact your administrator so they can assign you to the correct Site and Workspace.
Calendar – My Default Workplace Does Not Appear When I Select Multiple Days
When you select multiple days in your Calendar and want to set the Office status for all of them, your default Site and Workspace are not automatically filled in the Workplace field.
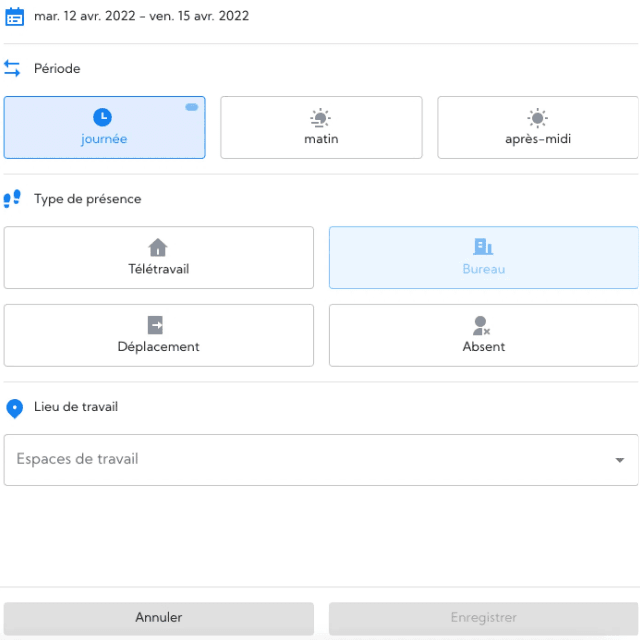
There are 3 possible reasons:
1️⃣ Your default Workspace is already full on one of the selected days.
You can easily check this in the list of Workplaces: this is the case if your default Workspace appears greyed out with the mention 0 seats remaining.
2️⃣ You are not assigned to a default Site and Workspace.
You can check this with your administrator.
3️⃣ Your organization uses flex office, and no employees are assigned to a default Site and Workspace.
Calendar – I Can’t Find Certain Workplaces in the List
When you set your status to Office in your Calendar, you may not find the Site and Workspace you want in the Workplace field.
There are three possible reasons:
1️⃣ This Workspace has not yet been created.
👉 Check with your administrator.
2️⃣ This Workspace has been archived.
👉 Check with your administrator.
3️⃣ This Workspace is a private or sensitive space that cannot be shared with other employees.
👉 If you are one of the employees authorized to use this Workspace, contact your administrator so they can assign you to it by default.
Calendar – I Can’t Make an Exception
When you declare a work mode in your calendar, a message may appear informing you that it does not comply with your manager’s rules.
Can’t make an exception?
There are two possible reasons:
1️⃣ You selected multiple days at once.
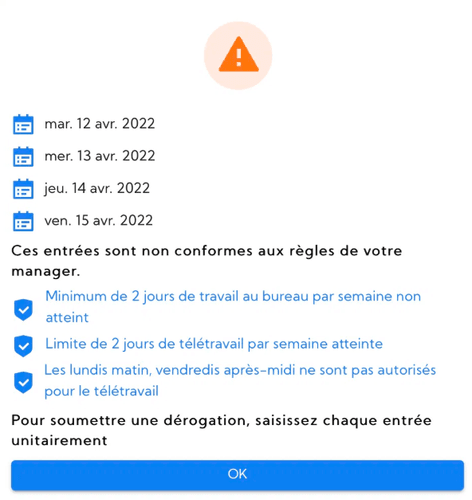
You must select each day individually to make an exception.
To understand this app behavior, let’s take the following example:
🤔 If I am allowed to work remotely 2 days per week and I select 3 days in the same week as remote work, the app needs to know which of the 3 days you are making an exception for in order to notify your manager!
It is therefore essential to declare your work mode individually in this case.
2️⃣ One of the triggered rules cannot be overridden.
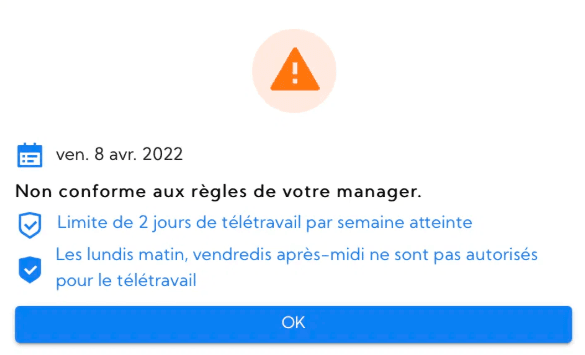
The rule that cannot be overridden is marked with an empty icon.
In this case, you are not authorized to make an exception to this rule.
If you still believe you should be allowed to make an exception, contact your administrator.
Calendar – How to Delete a Work Mode Entered for a Day?
Were you too quick and entered a work mode on a date that you now want to remove?
You don’t need to delete it! Simply change it by clicking on the relevant date.
And if you’re not sure about your work mode for that day, don’t worry! You can always update your calendar on the same day.
Calendar – How Is Part-Time Work Managed?
If you work part-time (4/5, half-time, etc.), you need to inform your administrator.
To check your working days:
👉 Click on your profile or initials in the top right corner of the screen, then select My Profile.
👉 Go to the Settings section.
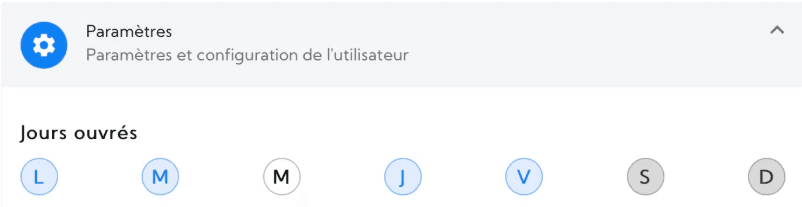
For example, your working days might be Monday, Tuesday, Thursday, and Friday.
ℹ️ The greyed-out days are non-working days set by your organization. If you work on one of those days, contact your administrator.
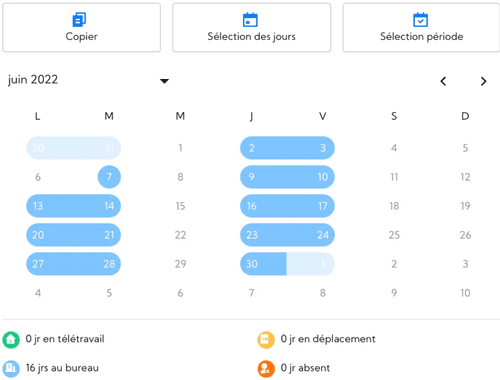
Your calendar automatically takes your working days into account.
Calendar – Can I Edit Past Days?
Editing days prior to today is not possible.
Only your manager or your administrator can do it.
In this case, feel free to contact them!